2. Food Link OnBoarding Process
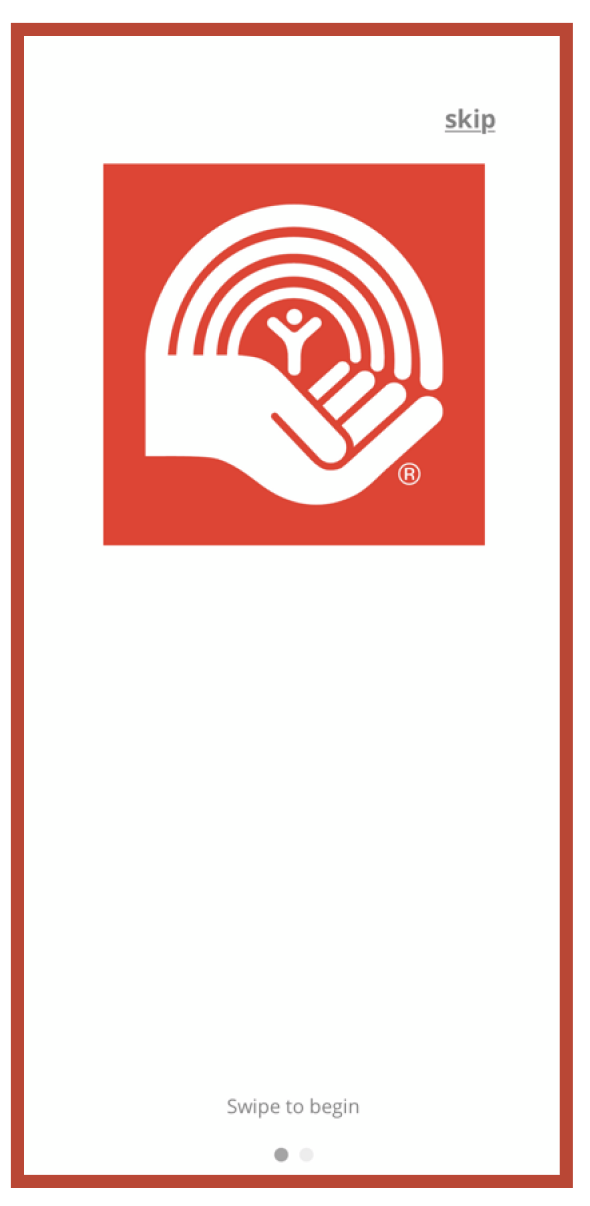
The first screen welcomes you to the app with the logo. The user is prompted to either "skip" or "swipe to begin". Both will take you to the sign-in/create account page.
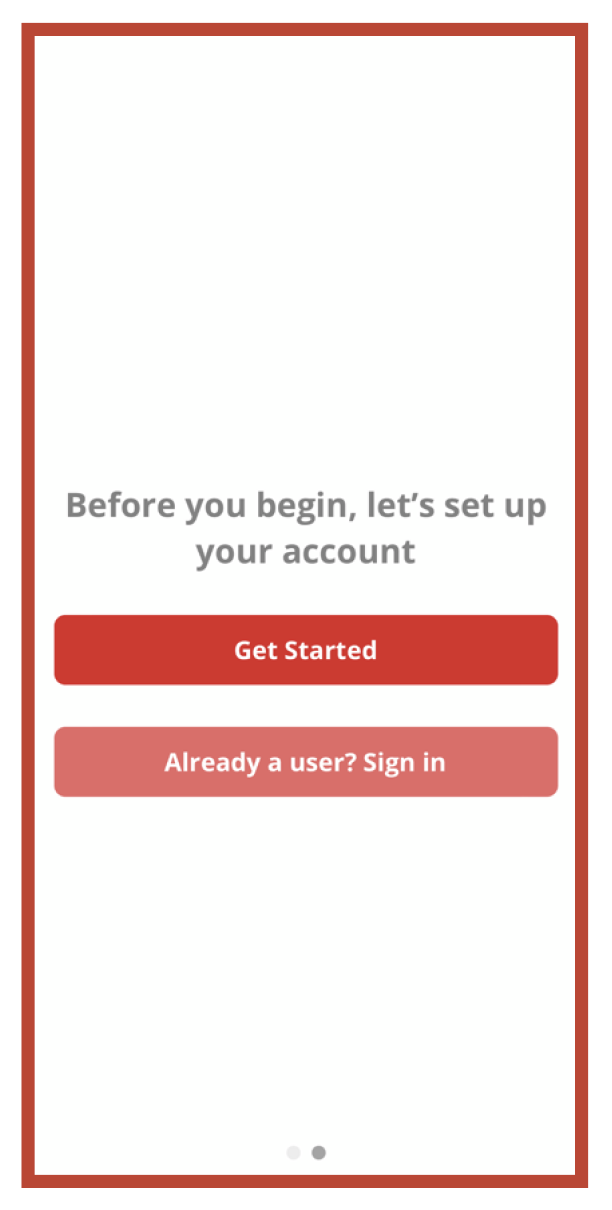
On this screen, the user is asked to set up an account. If they do not have an existing account, clicking "Get Started" will begin the process. If the user does have an existing account, they should click "Already a user? Sign in" to log in. This article covers the process of creating a new account.
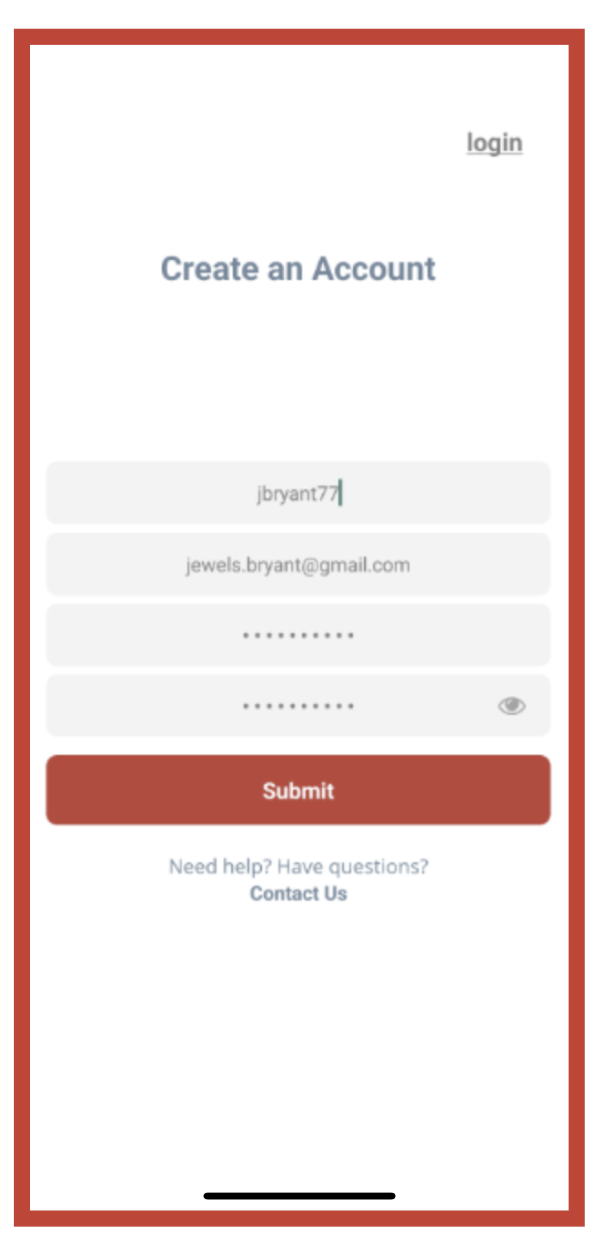
After clicking "Get Started" on the second screen, the user is brought to the third screen which allows them to create their account. Users will create a username in the first empty box, enter their email in the second box, enter their password in the third box, and re-enter their password in the fourth box. Users can also click on the eye on the password boxes to see what they are typing into the box. To finish creating the account, click "Submit".
 Once the user has created an account, they are redirected to the Log In/Sign Up screen. The user is notified at the bottom of the screen that they need to go to their email to confirm their account before logging into the app.

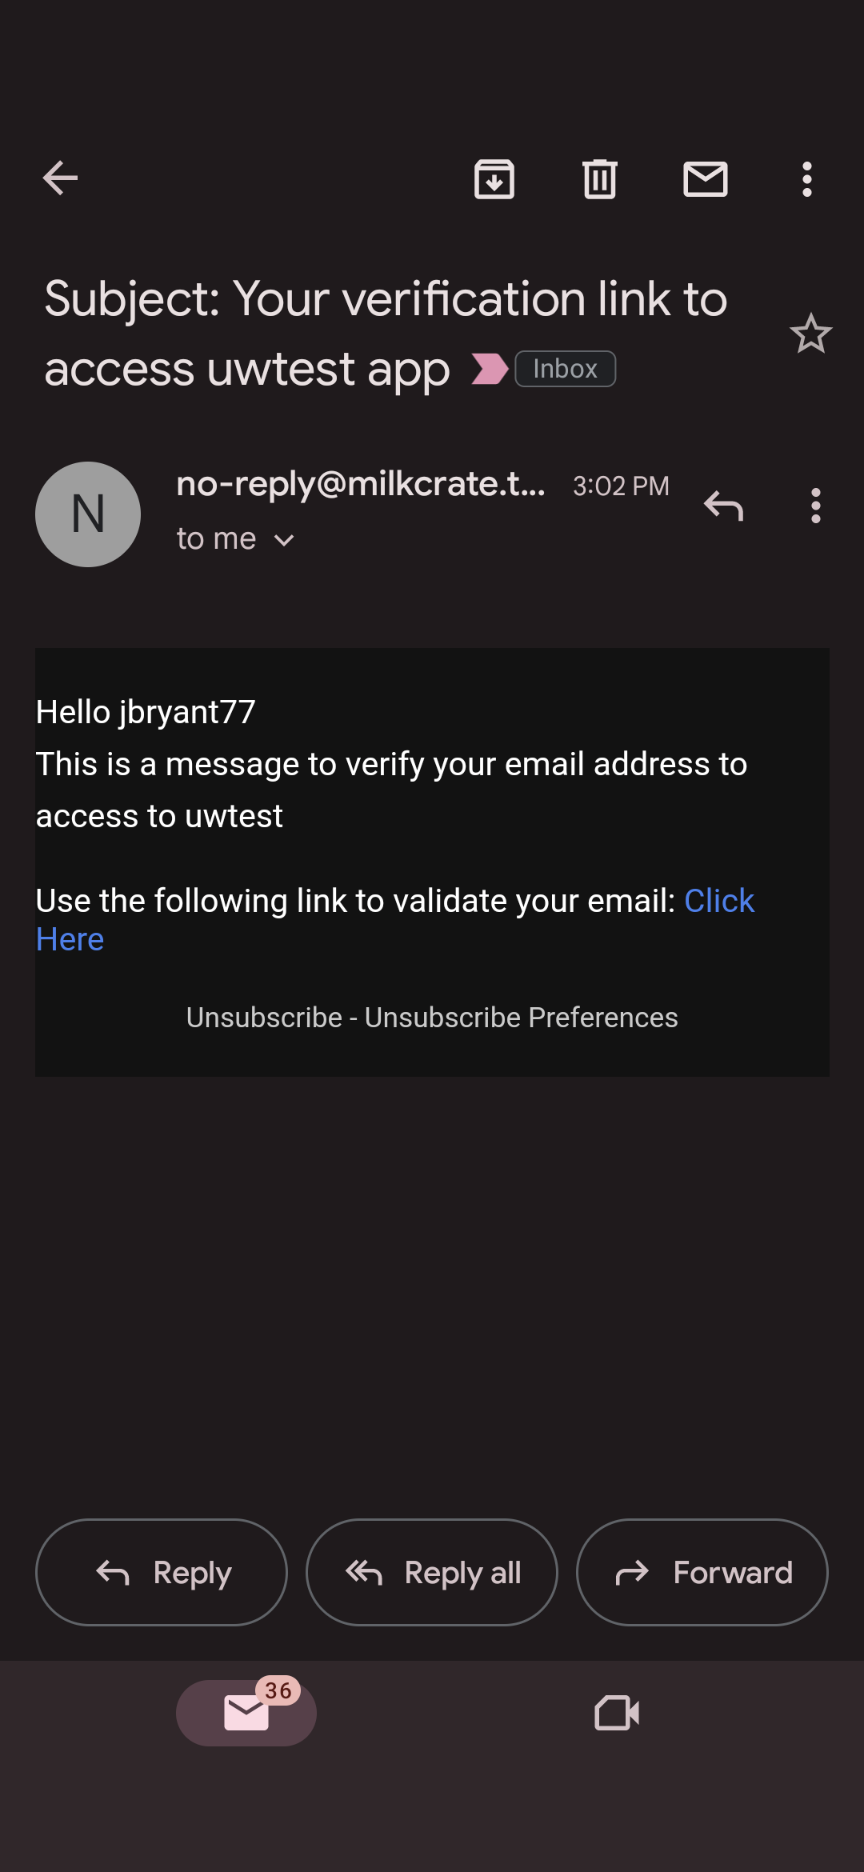
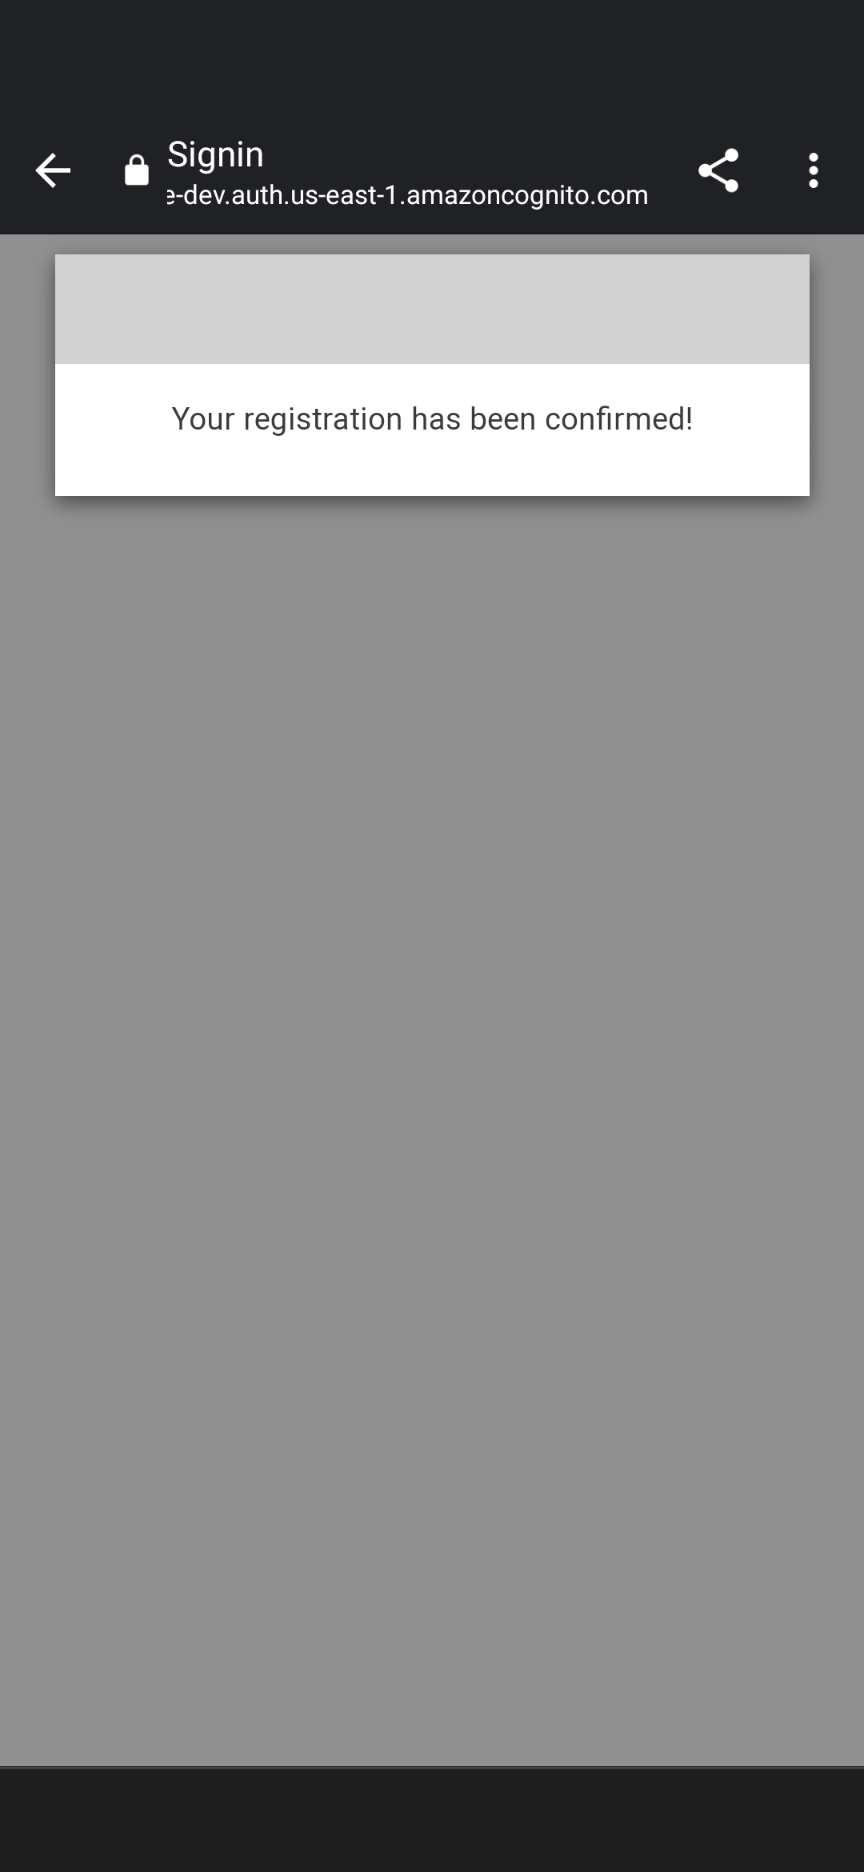
The user will receive an email with the subject "Your verification link to access the app" from no-reply@milkcrate.tech. In order to confirm their account, the user should click "Click Here" in the email body.
After the user clicks "Click Here" in the email they received, they will be redirected to a new page that will notify them that their registration has been confirmed. The user will now be able to go back to the app and log in.
When the user returns to the app, they will see the Log In/Sign Up screen again. To log into their account, the user should enter their created username in the first empty box, and their password in the second box. Once again, the user can click on the eye in the second box to see what they are typing as they are entering their password. When the user is done typing in their credentials, they can click the "Log In" button to enter the app.

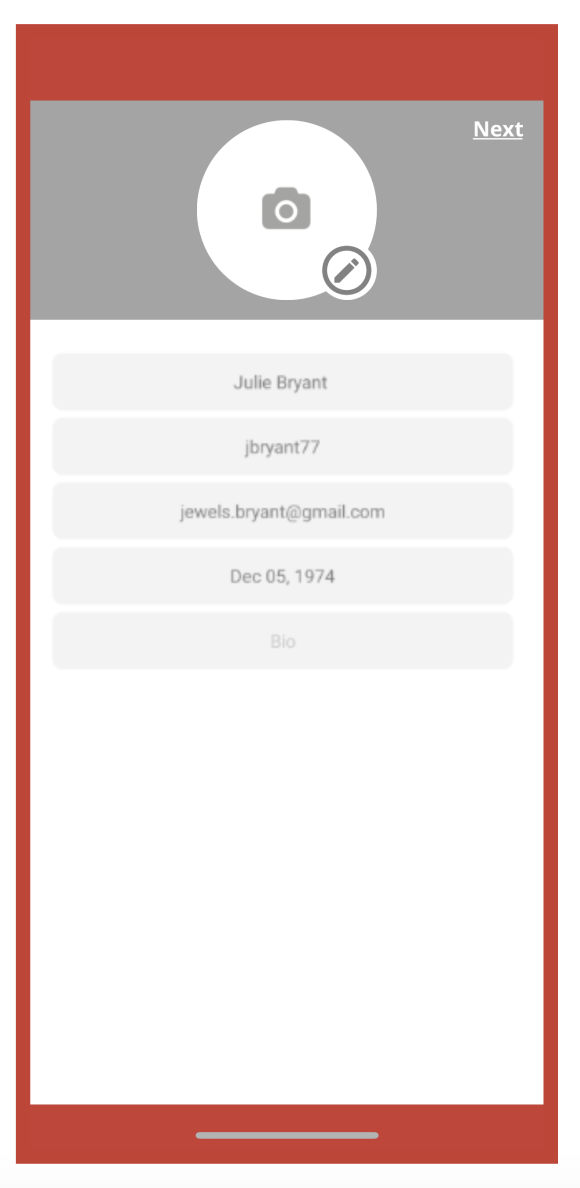
In the next screen, the user sets up their profile. Their username and email are automatically filled out for them. The user is required to enter their name in the first box, and their birthdate in the fourth box. Uploading a profile picture and entering a biography is optional. If the user would like to upload a profile picture, they can click on the camera icon above the boxes and select a picture to use. If the user would like to enter a short biography about themselves, they can enter it in the fifth box labeled "Bio".
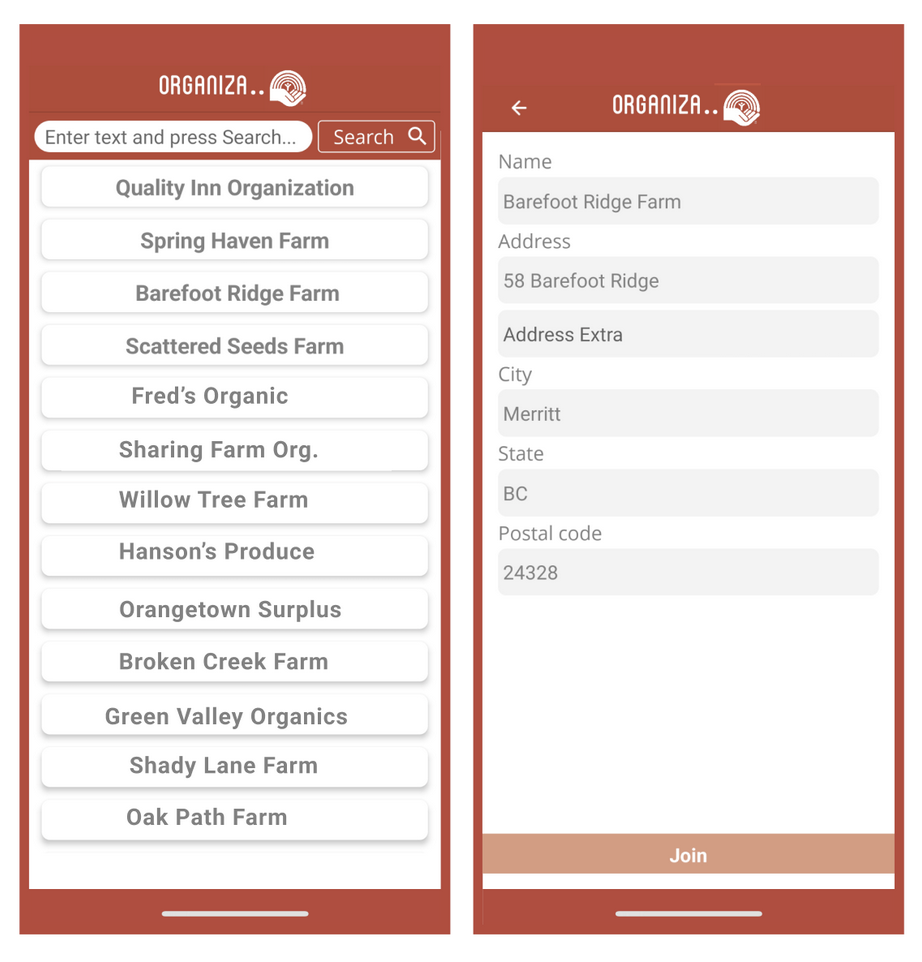
After setting up a profile, the user will be taken to a new screen where users can search for and join their organization. Users can search for, and click on the desired organization and it will bring up a new screen prompting you to join.
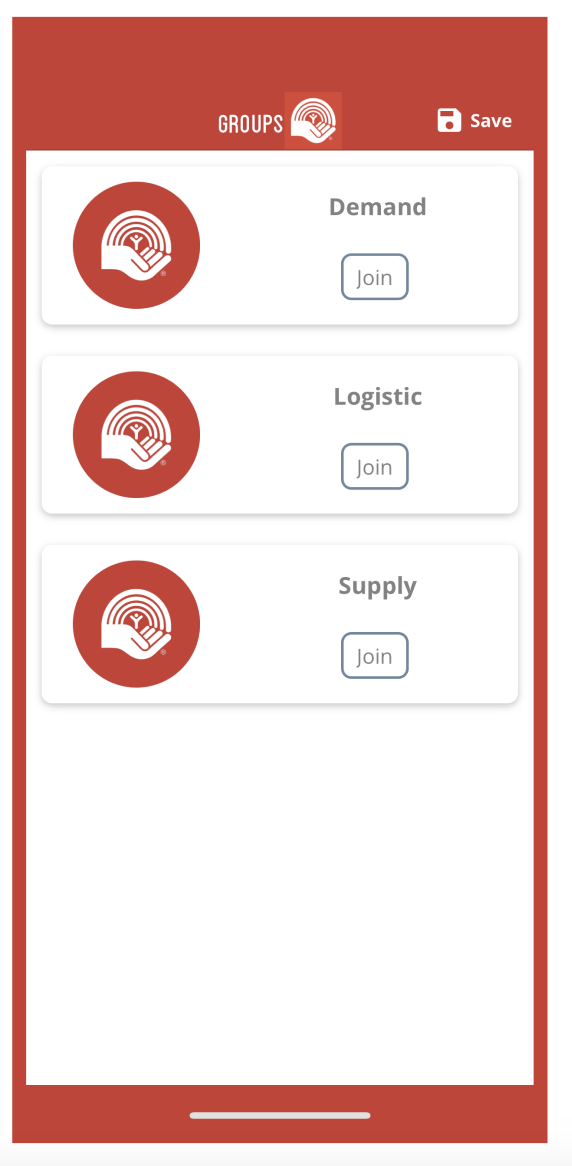
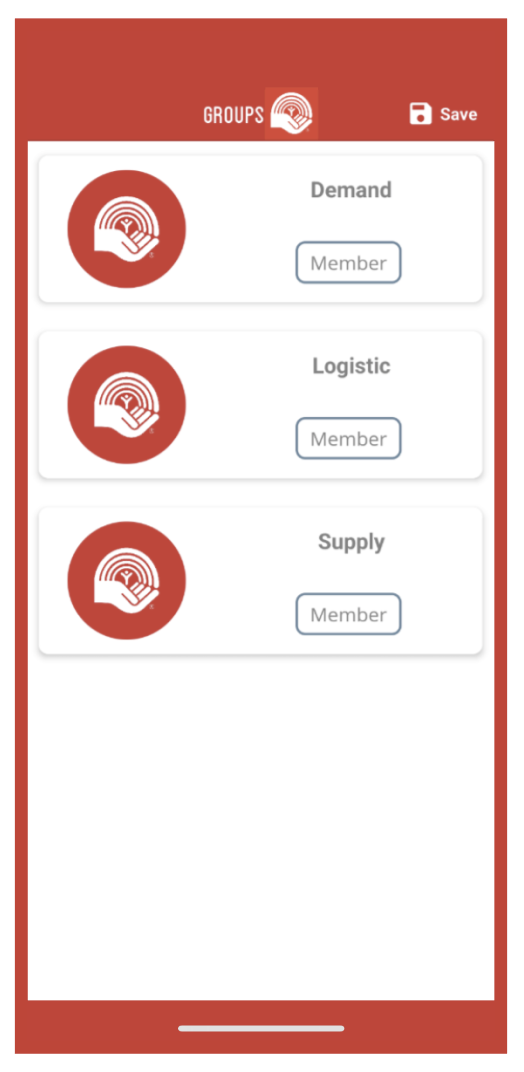
 The next screen will give the user the option to join one of three groups: Requester, Supplier, or Transport. If the user is requesting food, they should click the "Join" button under "Requester". If the user is supplying food, they should click the "Join" button under "Supplier". If the user is transporting food, they should click the "Join" button under "Transport". More then one option can be selected.
After clicking the group the user wants to join, they will be directed to a new screen that confirms they joined the group, and also see who else is a part of the group. Also on this screen, the user can leave the group by clicking "Leave group" at the bottom if they joined by accident. The user can click the back arrow in the top left to return to the previous page.
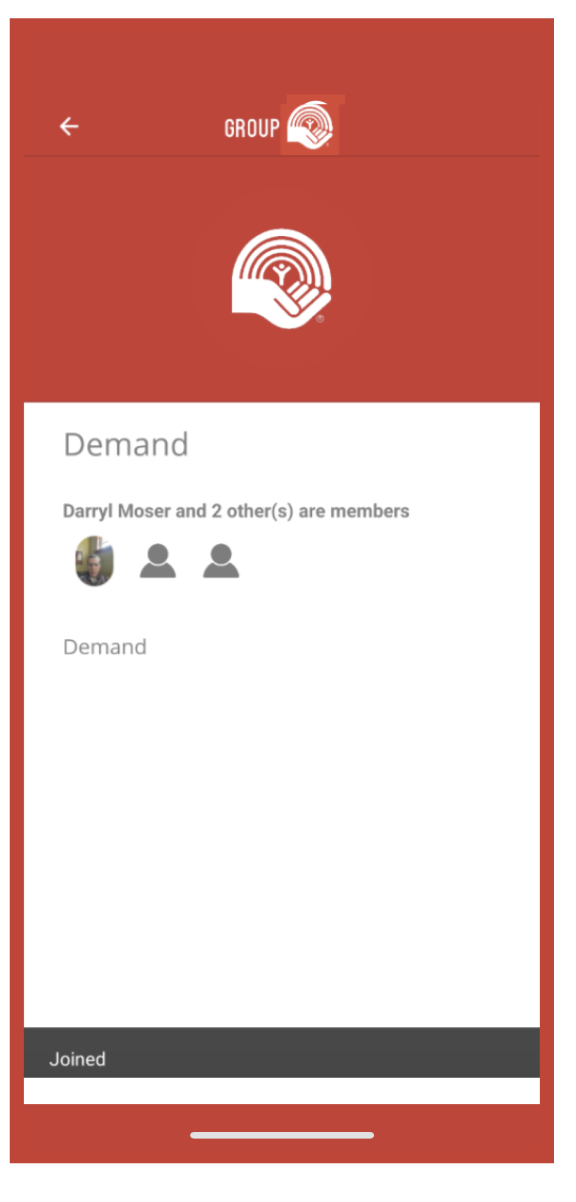
The user has the option to join multiple groups if they would like to do so. As seen in the screenshot below, the user Julie is a part of the Requester and Transport groups. After joining a group, the user's membership is confirmed with a popup at the bottom of the screen that says "Joined". After selecting each group the user wants to join, they need to click the "Save" button in the top right to save their membership in the groups they joined.
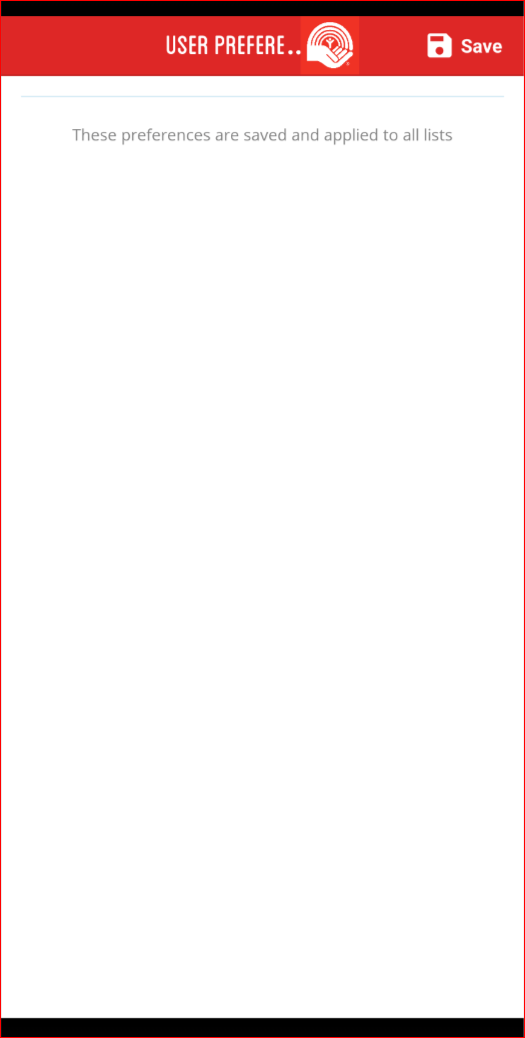
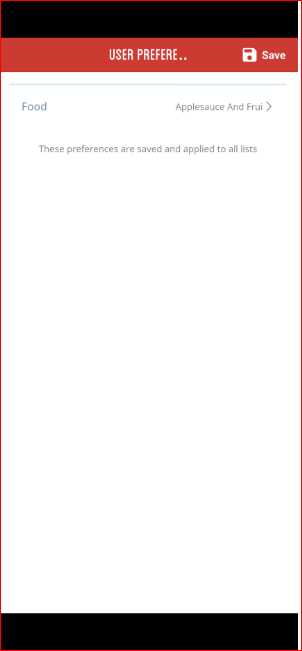
The next screen is the User Preferences screen. The user can set up a preference for any searching they will do within the app or if they wish not to set up just click "Save" located on the top right-hand corner. To set up preferences select the section you would like to set up preference at this time the only preference available to the user at this time is for "Food". The user should click the arrow on the right of "Food" to select their preferences.
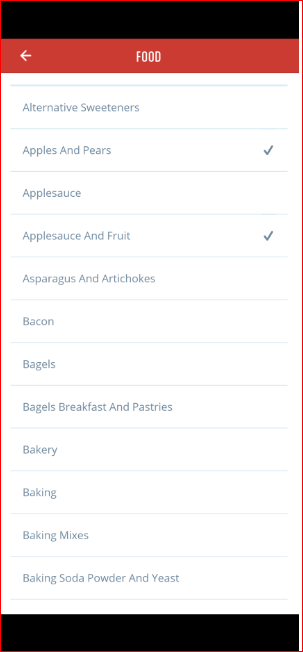
The user will be presented with a list of food options. The user will swipe down to go through the list and click on the food options they would like to request, supply, or transport. They can click multiple options. Once the user has selected their preferences, they should click the back arrow in the top left to return to the User Preferences screen.
Once the user returns to the user preferences screen, they should click "Save" on the top right to save their preferences.
The onboarding process is now complete! After saving their preferences, the user is brought to the Home Screen of the app where they can request and view Donations, Requests and Volunteer Opportunities.
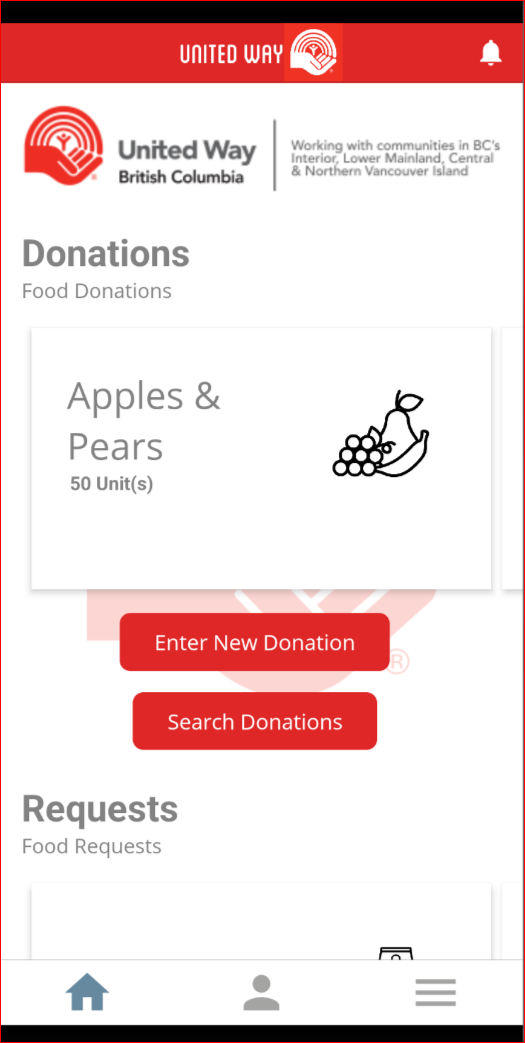
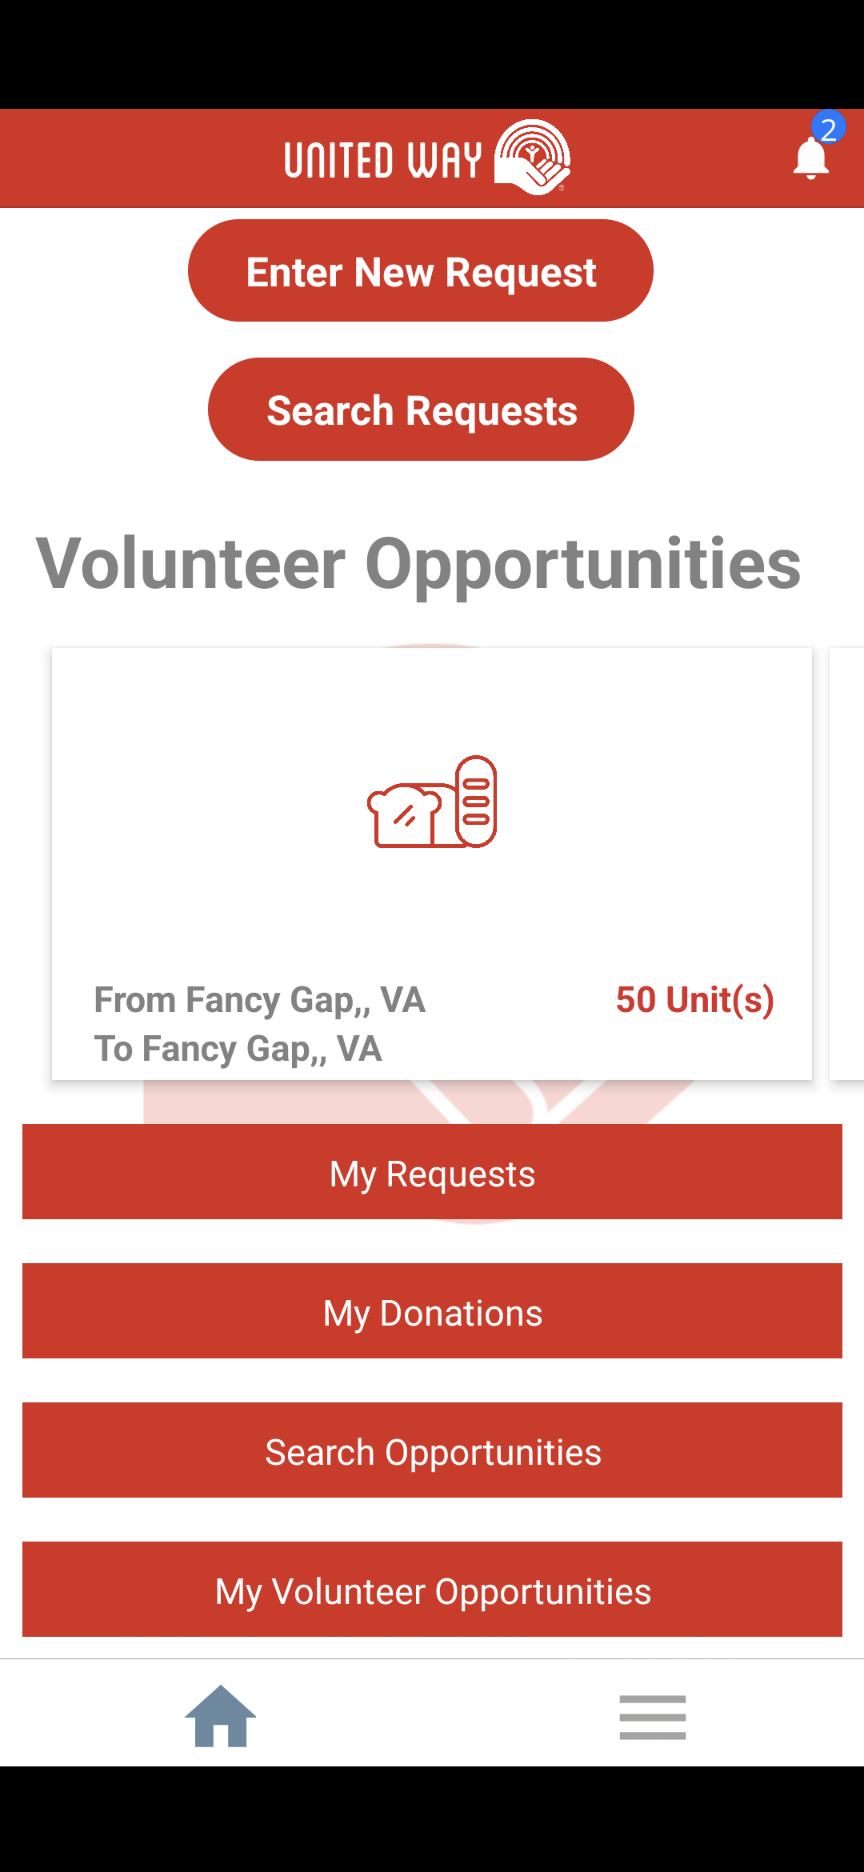
If the user swipes down on the Home Screen, the Home Screen also allows the user to click on buttons to view their request, volunteer opportunities, and their donations.
Related Articles
1. Overview of the Food Link by United Way BC .
The Food Link by United Way BC app provides a structure to identify food needs and to have those requests met by donations from food providers in the three regions of Surrey, North Okanagan, and Upper Fraser Valley. Terms: Food Requests The primary ...New Team Member Onboarding
Table of Contents Today's Agenda About MilkCrate Platform Interfaces: How and why would some one access the platform? Platform Strategy: What problems does the platform solve? Platform Features: How does the platform solve problems? Platform ...4. Enter New Request/Search Requests
Enter New Request: Users can enter new requests within the app. To do this, press the "Enter New Request" button on the home screen, and the "Enter New Request" screen will be displayed. The request screen will be blank; you will have to select ...3. Enter New Donation/Search Donations
Enter New Donation: Suppliers can enter new donations within the app. To do this, press the "Enter New Donation" button on the home screen, and the "Enter New Donation" screen will be displayed. The donation screen will be blank; you will have to ...Home Screen Ticket (How to Complete)
Table of Contents Overview Daily Polls Block Challenges Block Goals Block Leaderboard Block Link Block Headers & Images Block Spacer Block Survey Block Categories Block Built by MilkCrate Block Sub Screens Overview Our blocks make it easy to ...