Groups
Table of Contents:
Overview
Groups are a great way of making sure your members see your content and remain connected, as well as restricting who can actually join your group at any given time.
Joining Groups
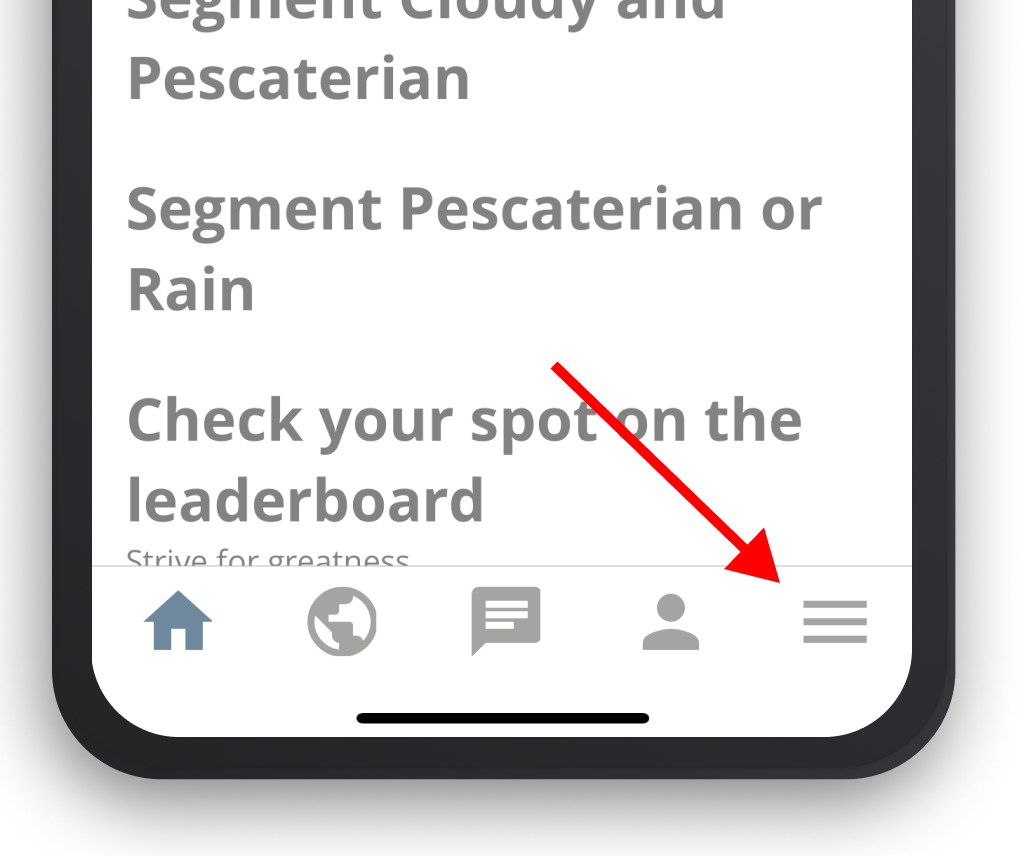
New users will be given the chance to join groups upon creating their accounts. After the fact, users can join new groups by navigating to their "Menu" in the bottom right corner of the app.
.png)
.png)
Once in the Menu, select the "Groups" tab to view a list of the groups created for your app. Here, users can quickly join a group by clicking the "Join" button or they can click on the icon to view more information about the group itself.
Creating Groups
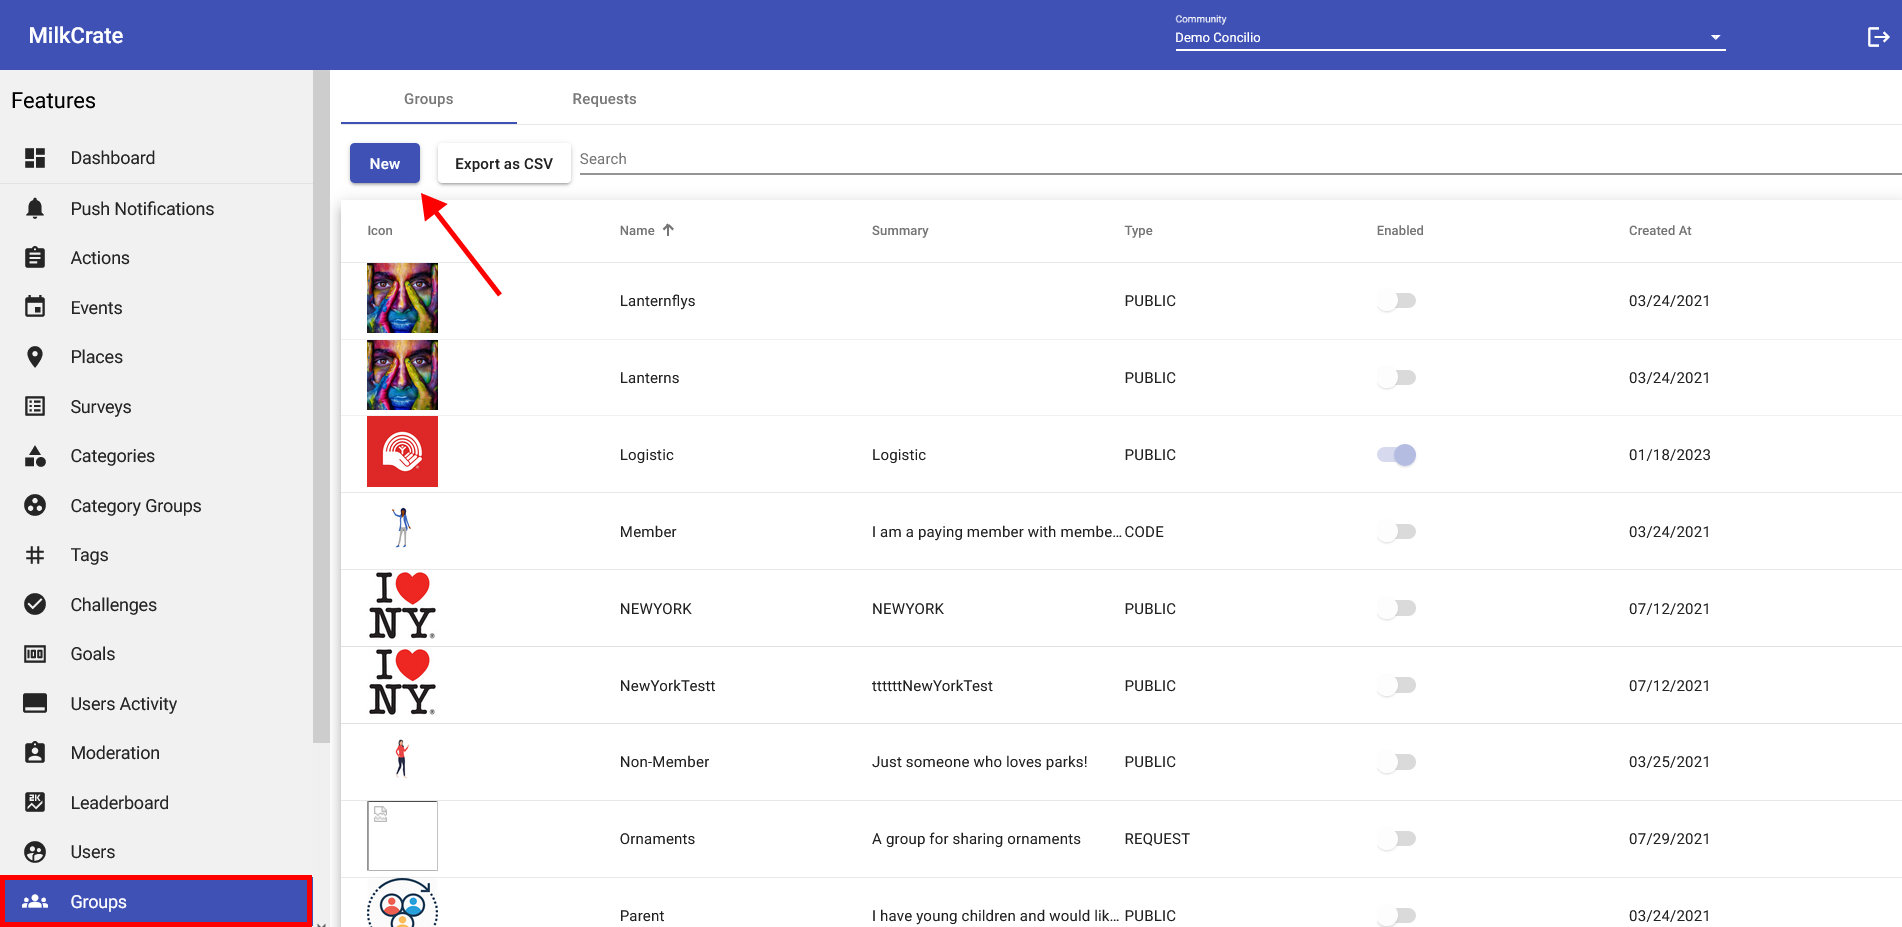
In order to create your group, first navigate to the "Groups" section in your Admin Portal. Once on this page, click the "New" button in the top left corner to get started.
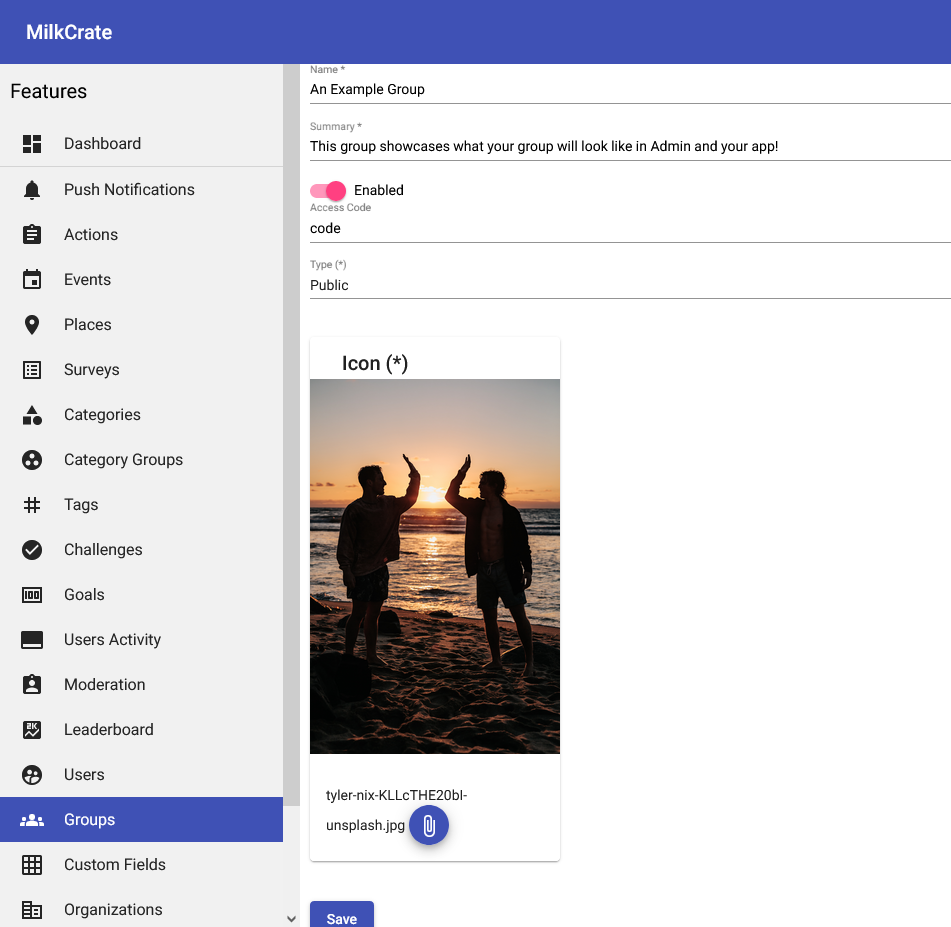
Here you can give your group a "Name" and provide a "Summary" of what you do within the respective fields. Make sure to click the "Enabled" toggle so that your group is visible to users on your app.
An "Icon" or cover image is also required to create your group. This can be a brand identity symbol or an image that showcases what your group is about. Keep in mind that this image will be condensed into a circular icon that is fairly small within the app environment.
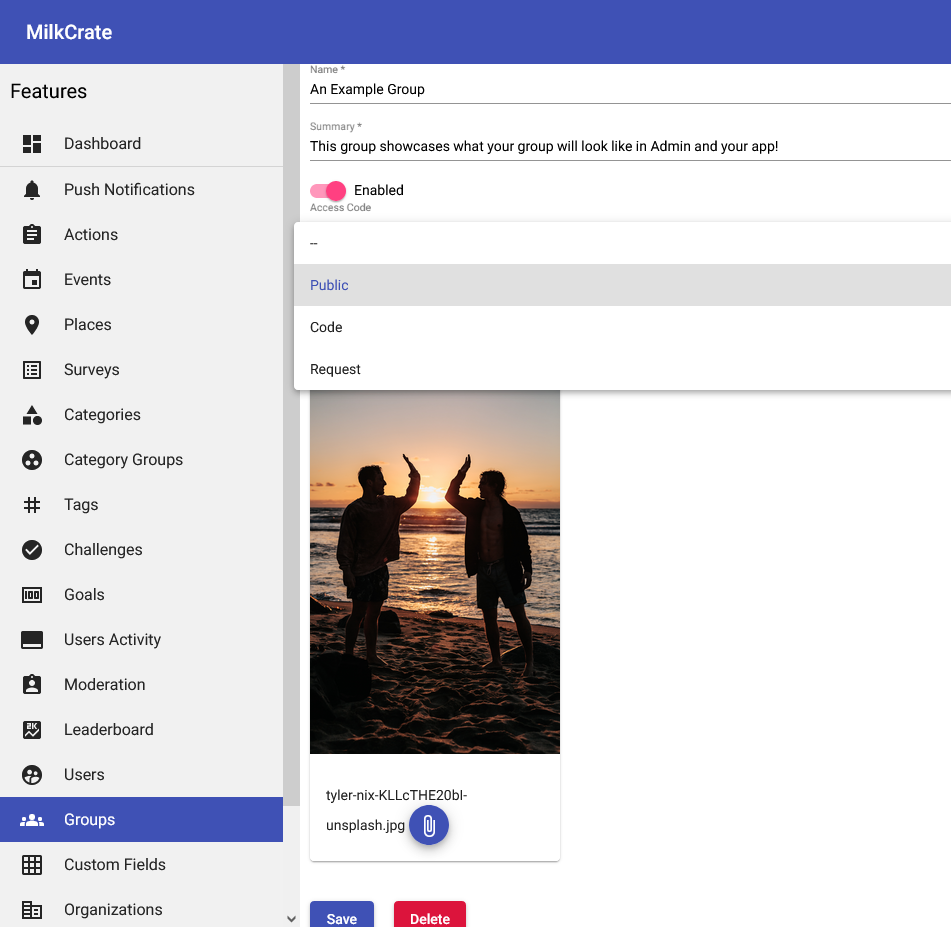
"Type" is another required field, and allows you to restrict who is able to join your group.
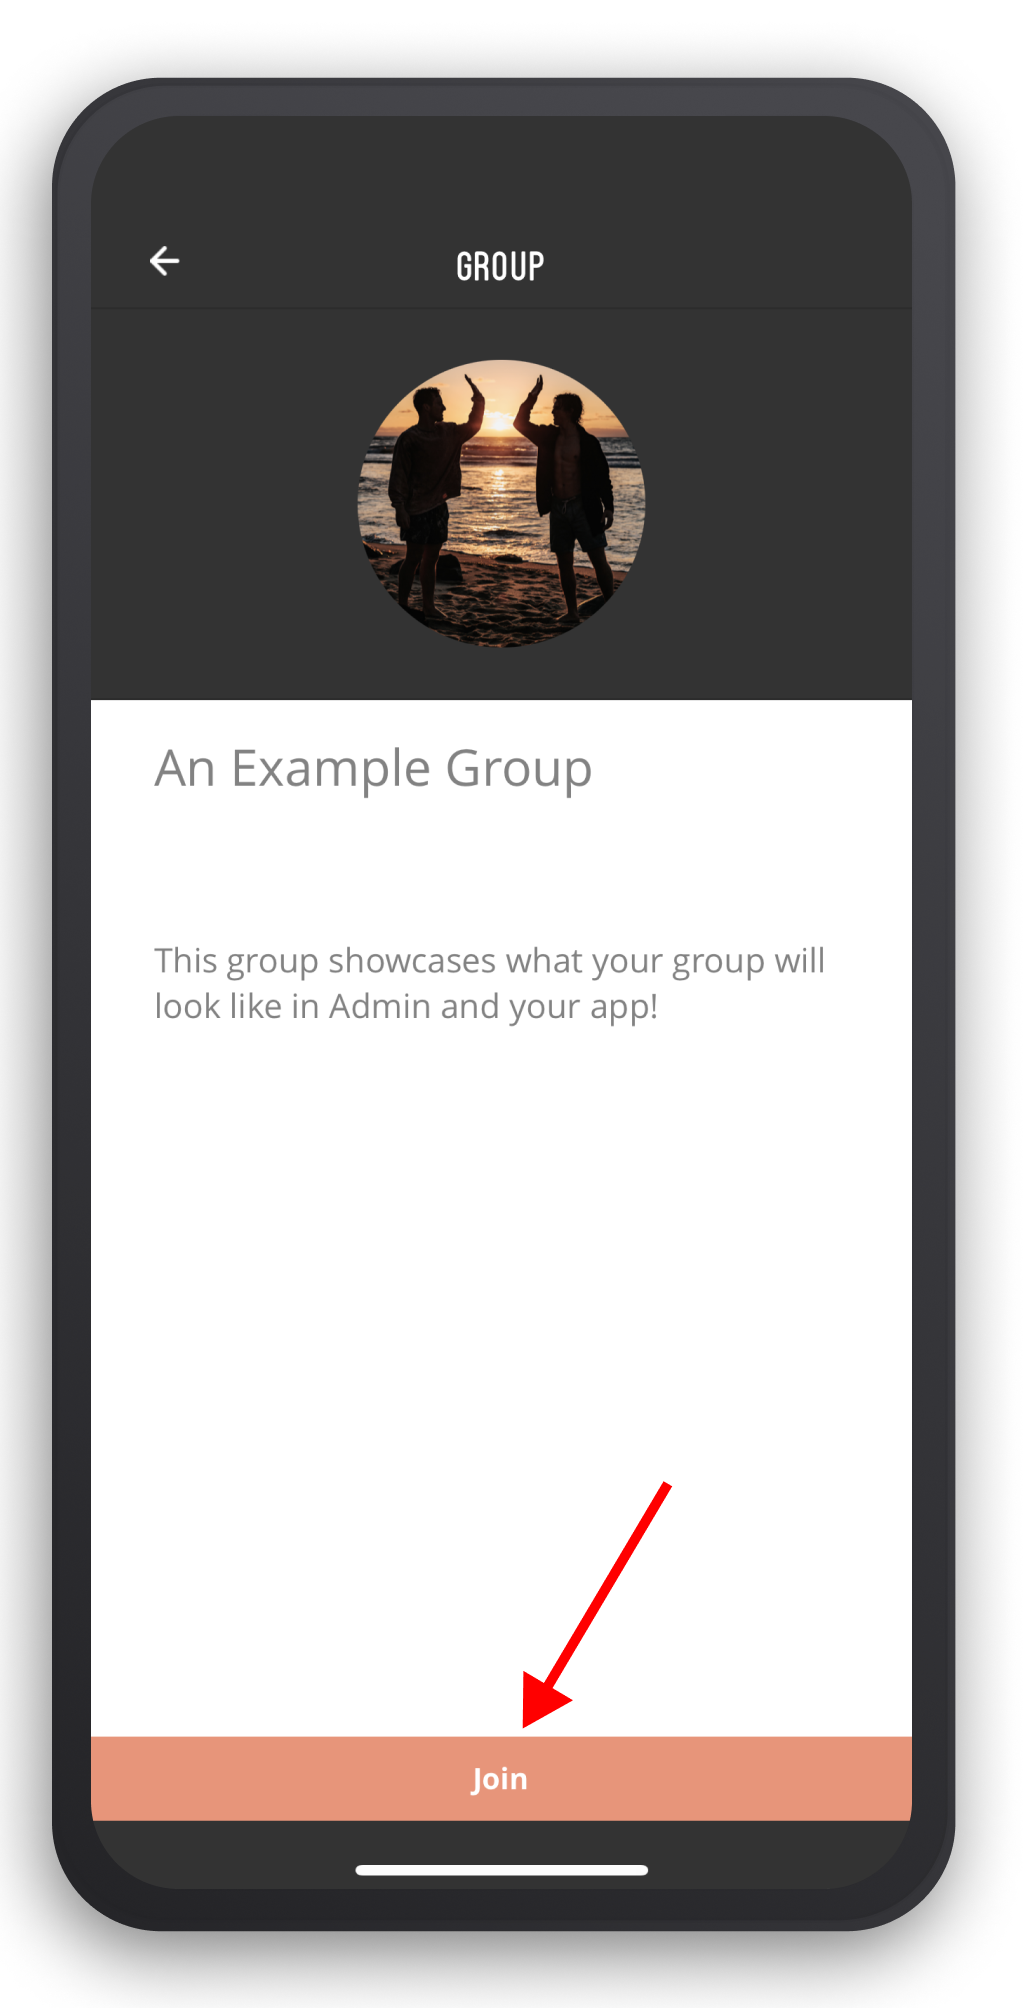
- Selecting "Public" allows anyone that is on your app to join without restriction. Once a user presses the red "Join" button at the bottom of their screen, they will receive a popup telling them they have successfully joined the group.
.png)
- Selecting "Code" will require users to enter a code before joining your group. This code can be set within the "Access Code" field. Keep in mind that simply entering an access code will not require users to enter one and that in order to utilize this feature you must select "Code" within the "Type" field.
- Selecting "Request" will require the user to first send a request that must be approved within Admin (see below for more details).
.png)
.png)
Managing Join Requests
.png)
If you decide to set your group to "Request" within the "Type" field, users will be required to first send a request (accompanied by a message) that must be approved within Admin. In order to review any requests your group has received make your way to the "Groups" section of your dashboard and click on the "Requests" tab.
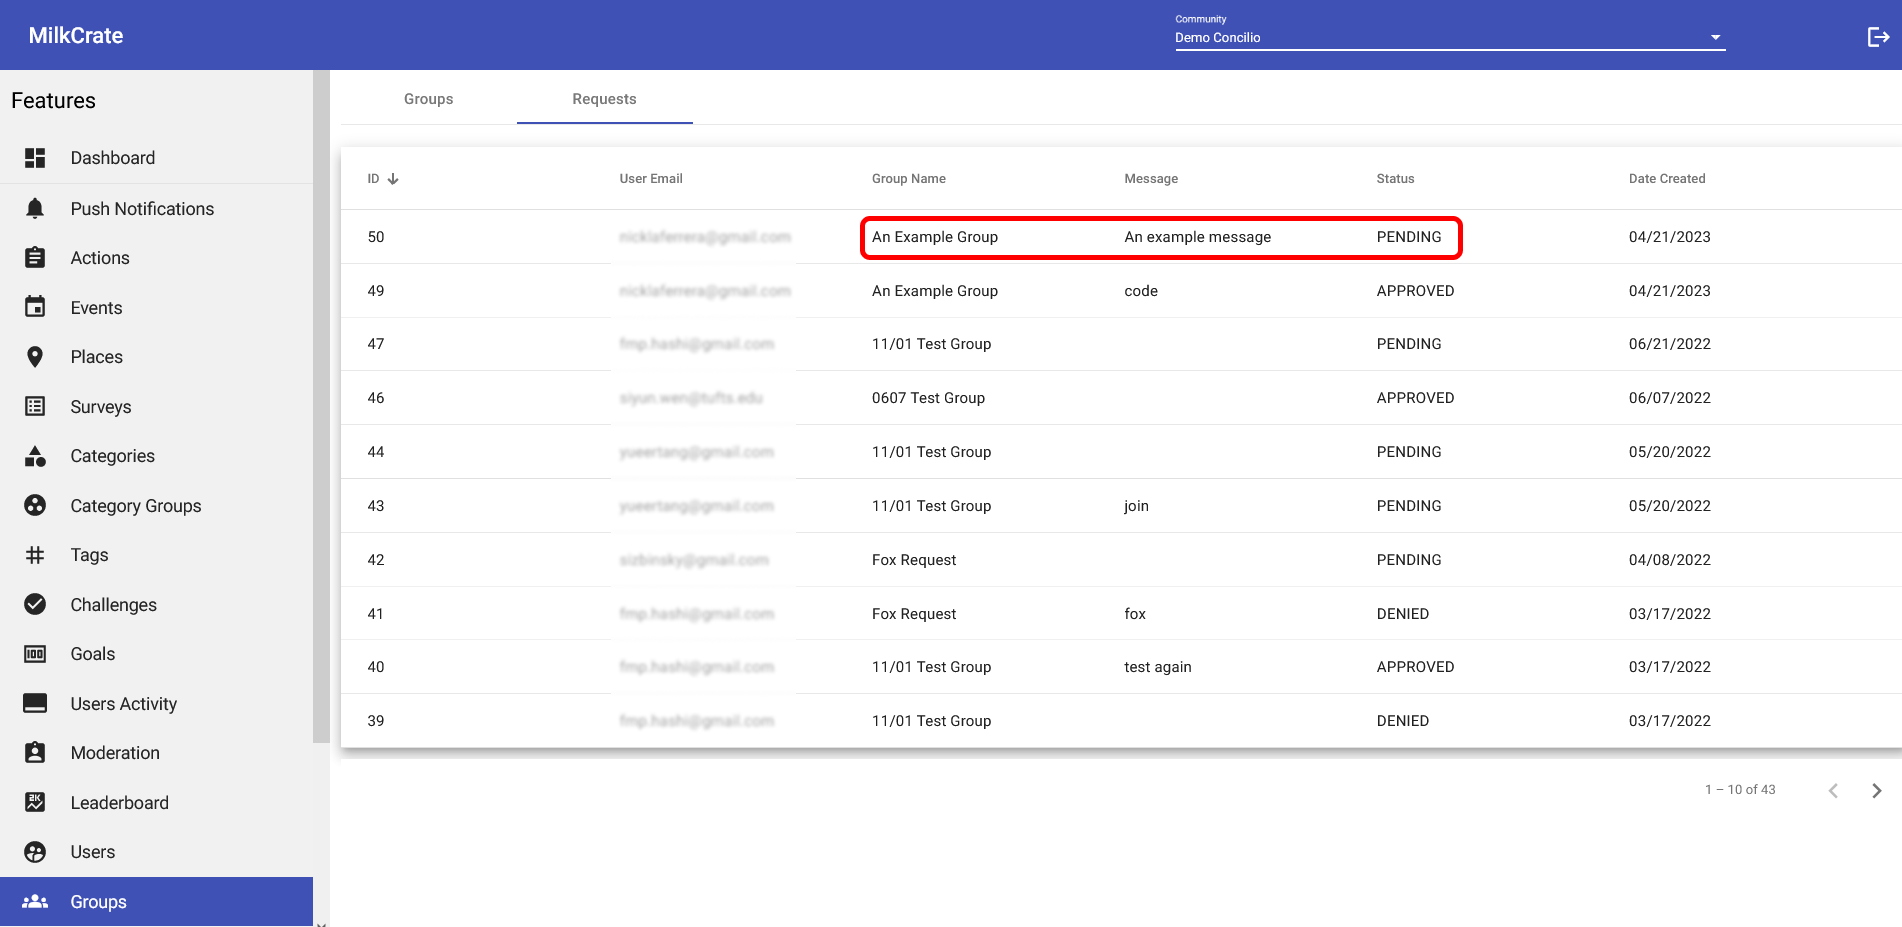
Here, you will be able to view any and all requests your group has received from your users. The "User Email," "Message," "Group Name," and current "Status" can all be viewed from this tab. To view more information about a single request, simply click on its row.
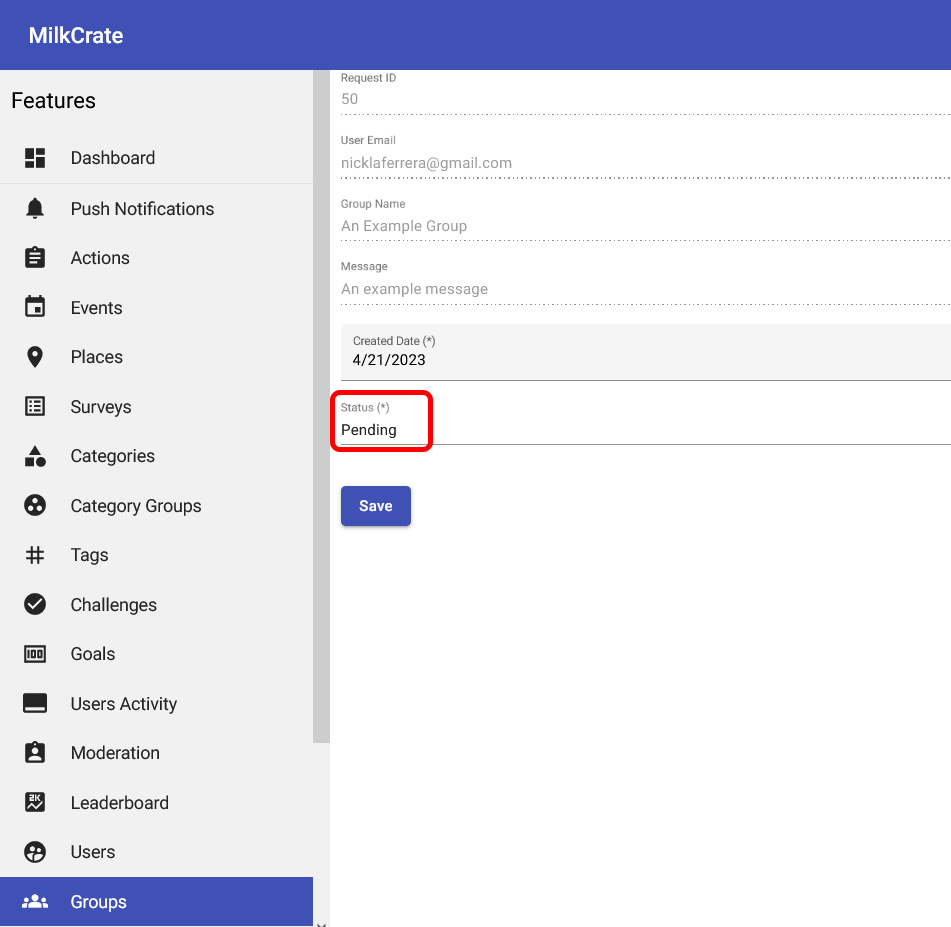
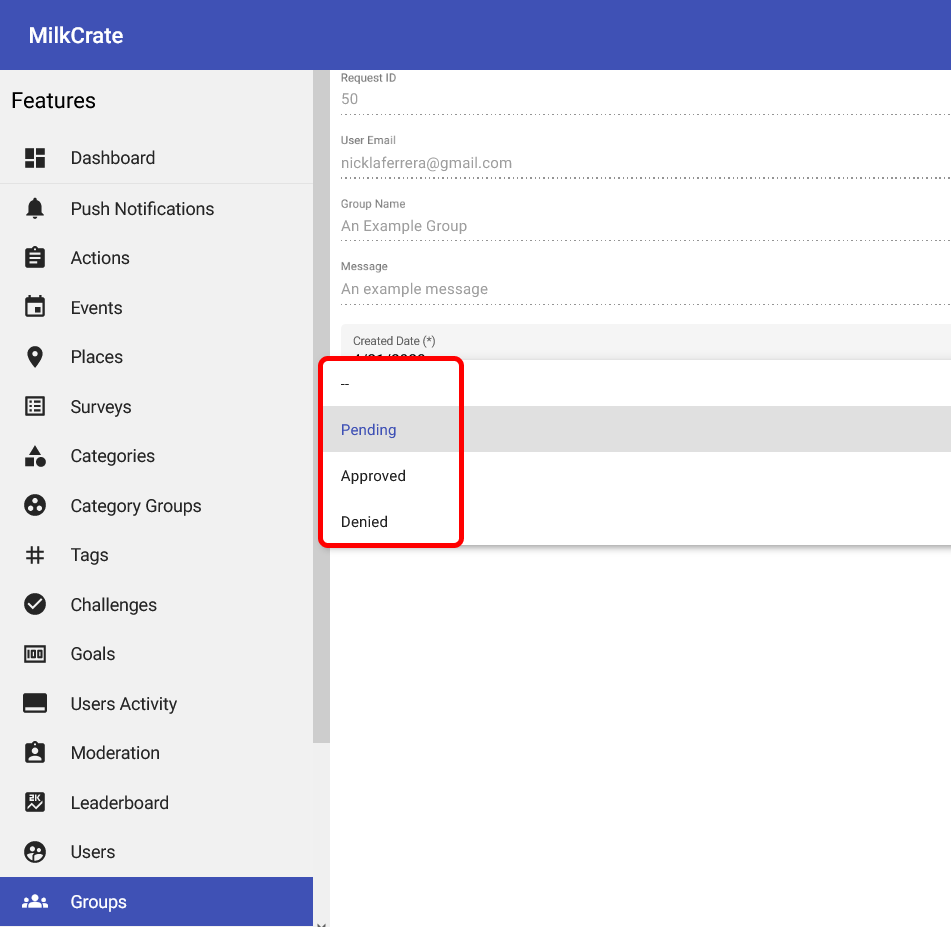
All of the information from the previous page can still be viewed from here, but now you can click on the "Status" field in order to change it. Upon clicking "Status" a dropdown with the options "Pending," "Approved," and "Denied" will appear, allowing you to decide whether or not the selected user will be admitted into your group. Don't forget to hit the blue "Save" button in order to save your changes.
Related Articles
Categories & Groups
Table of Contents Overview Category Groups Creating Categories Issues Overview Categories allow you to organize all your activities! These include your actions, events, places, and surveys. When creating these activities, it is required that a ...6.2.0 Robust Surveys, User Groups & App Store Information
June 17, 2020 We are rolling out a major update to our survey system which includes a variety of new question types and the ability to view user responses via the Admin a big shout-out to VetTriage for making this possible. Additionally, we have been ...Organizations
Organizations If you choose to use the organization feature in our platform you will be able to manage the different organizations via the Admin. Add, remove, and edit organizations. We recommend if you are going to use this feature to add a dozen ...Managing Profile Fields
CONTENT Managing as a User Managing as an Admin Managing for specific User Groups As a User Users can manage their profile fields by heading over to their profile>settings cog>edit profile. As an Admin you get to decide what fields are available and ...Goals
Table of Contents Overview How to Add Goals Overview Goals are linked to a category. You can set multiple goals associated with one category, for example, if you had an event category you may make a goal per month so you can track monthly event ...