Help Articles: How to Include Videos as Gifs
Table of Contents
Overview (click here)
Embedding your Video (click here)
Converting to GIF (click here)
Overview
Visuals are extremely helpful when writing Help Articles. They serve many purposes such as providing a demonstration of what the user can expect when they're using the app on their own.
If you are trying to include videos in your HubSpot Help Article, try this.
Embedding your Video
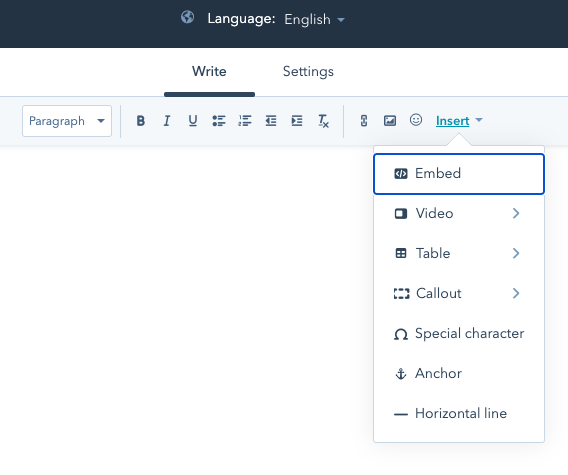
When you embed a video, you are hosting the video at another location and simply linking to it. For this option, navigate to the toolbar of your Help Article.
Look for the Insert Dropdown menu. Here you can select 'Embed'
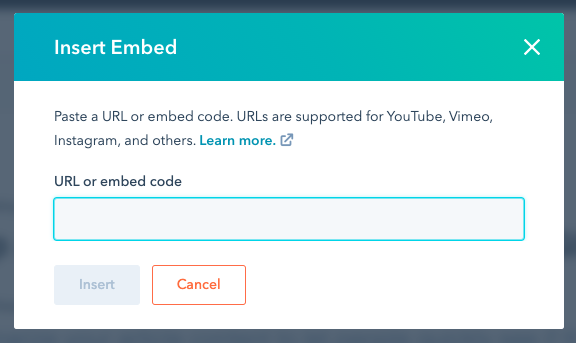
A popup will appear. This is where you can input the URL of the video you would like to embed
Convert to Gif
If you do not want to embed your video, try this option instead! Convert your video into a Gif!
For this option, we will be using this easy and free website designed to convert files from one format to another. Click here to convert your video!
Note ** You are not required to use the same video converter as this demonstration. If you'd like, take the time to find a video converter that works for you.**
Converters can be found simply by typing in the following into any search engine.
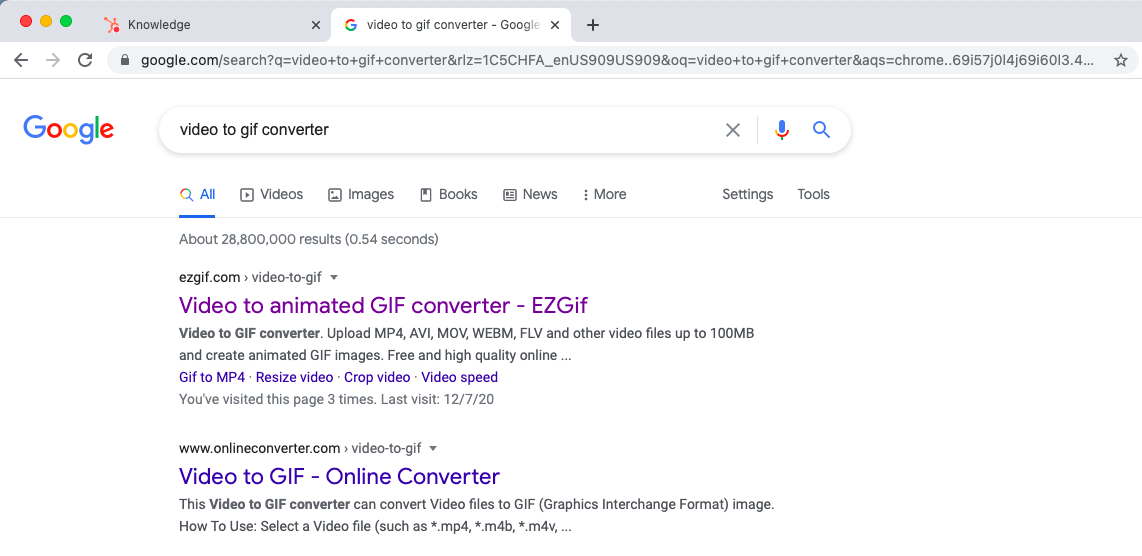
1. EzGif Converter: Upload your file
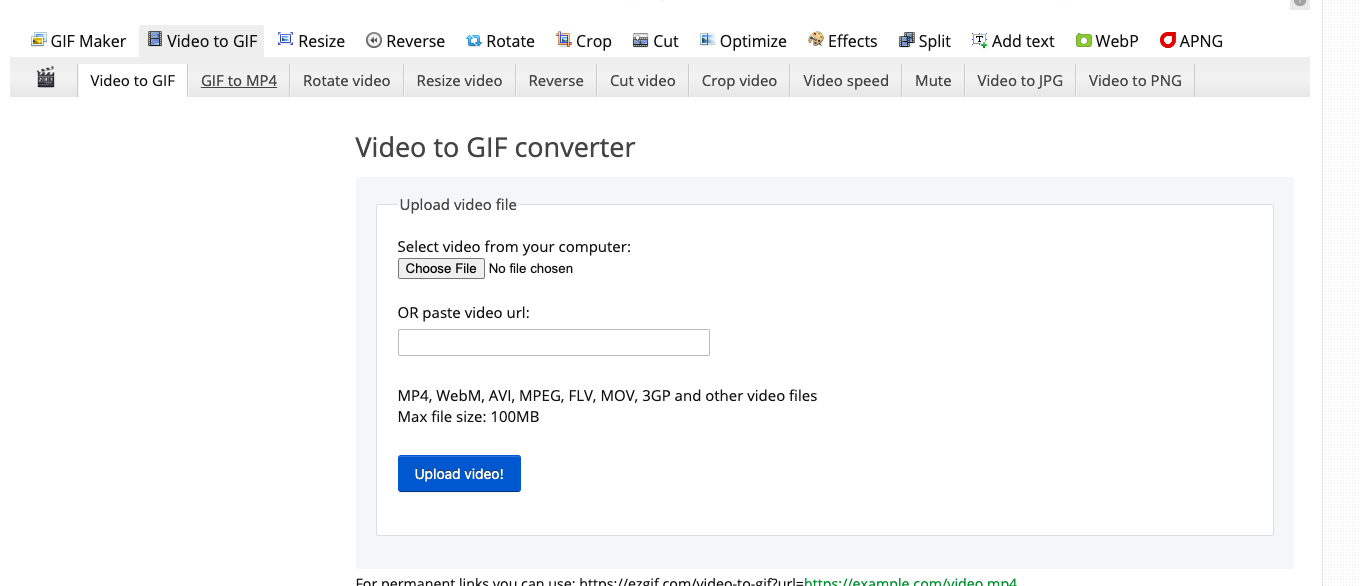
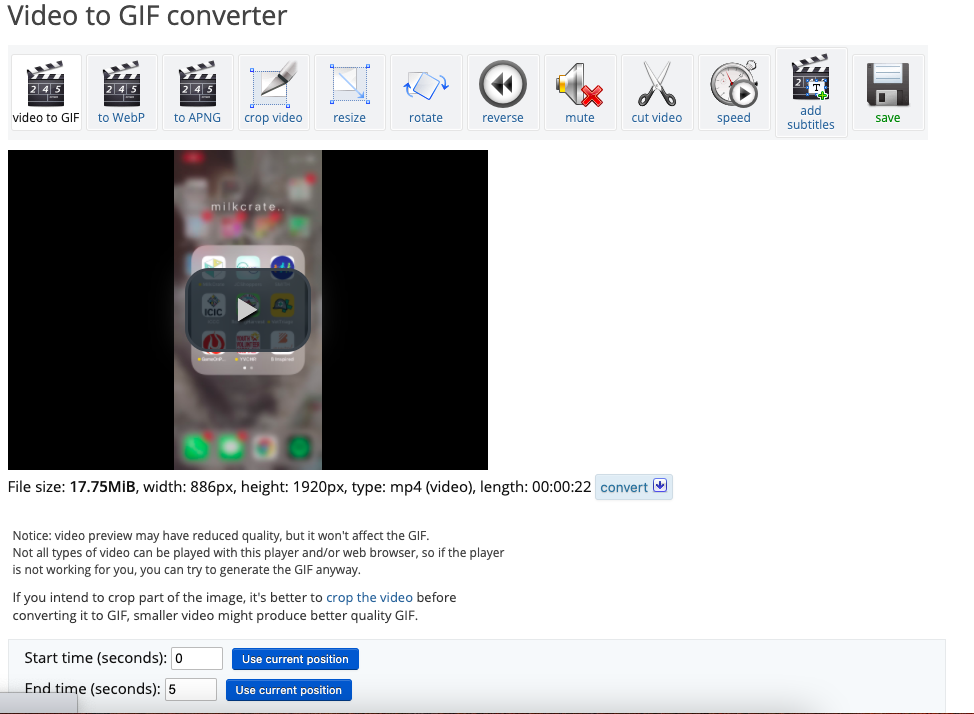
Take a minute to look at the different conversion options this website has at the top of the page. We want to be on the tab that says "Video to GIF".
Choose the video you would like to convert from your files and press Upload Video!
2. Video Converter
You should be brought to a new page and should see a preview of the video you Just Uploaded from your files.
Press on the play button to check to see when your video begins and ends
3. Converter Settings
1. Start time: Choose where in your video you would like your GIF to start playing from
2. End time: Select the time where you want your GIF to end
** Generally, if I am including a video on Articles, I would want my video to play from beginning to end. I would set the time from 0:00 / 0:22 in this instance **
3. Size: Choose the quality you want your GIF to be. The higher the quality the bigger the size file will be.
4. Frame Rate: For this portion, pay attention to the seconds. If you choose a frame rate that has a max time that is shorter than your End Time, your GIF will cut off at the MAX time.
**This means if I choose 20 frames (max 15 seconds) my video will be cut off at 15 seconds instead of the 22 seconds where I wanted my video to end**
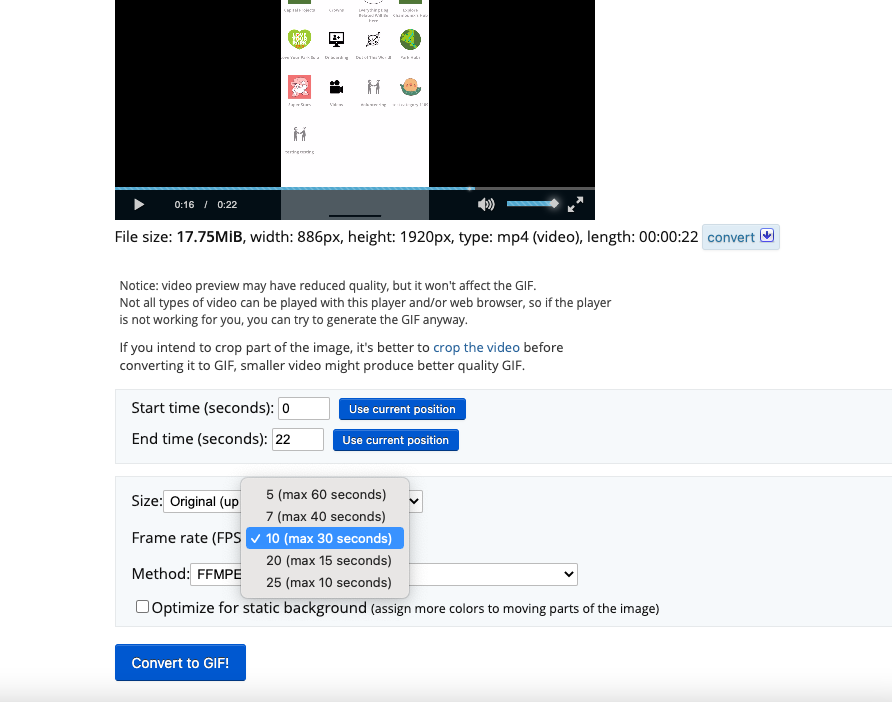
Play around with the settings until you are satisfied with your video. Click 'Convert to GIF' when you're finished
4. Edit and Save
Be patient once you convert. Your video will take a moment to update. Scroll down to the OUTPUT GIF Section once your video has processed.
There are many options towards the bottom of the screen where you may choose to edit your newly created GIF. Review your GIF to see it contains all the information needed for your Article. If you think it is missing information you can modify the frames on the bottom right!
Once you are happy with your video, Save the file onto your desktop.

5. Upload to HubSpot
Now that your GIF is finally created, head back over to your Help Article and give your GIF a nice Drag and Drop onto your Article! The GIF should be able to live on your Article similarly as an image would, and will continuously loop your GIF.
Related Articles
Help Article Ticket (How to Complete)
Table of Contents Why Help Articles are Important Internal vs External Help Articles Best Practices When Writing An Article Why Help Articles are Important Back in the summer of 2020 the team sat down and identified a few words we should keep in mind ...Submitting Feedback from the App
Have you ever encountered a bug while using the app and you could not find a solution to it even after reading our help articles? Or you needed help deleting a dummy account, or maybe you had a suggestion but do not know who to contact or how to do ...Design Intern
Table of Contents Your Role Building General UX/UI & Design Knowledge Building Platform & Role Knowledge Your Role As a design intern, your primary objective is to keep the current customers happy within the constraints of the platform. This is done ...Landing Page Ticket (How to Complete)
Table of Contents Step 1: Gain access to the customer's website builder Step 2: Create a Landing Page Draft for Clients to Review Step 3: Build the Landing Page Step 4: Notify the customer and our general slack Step 1: Gain access to the customer's ...General Inquiry Ticket (How to Complete)
How to handle a lack of clarity Customers are not required to know the platform like the back of their hand but a customer should be able to search our help articles to FIND the answer. There are a few scenarios 1. The help article exists but the ...
