New Community/Customer Ticket (How to Complete)
Table of Contents
Step 1: Setting up the community
Step 2: Adding Jamie Crate and the customer's team
Step 3: Setting up the home screen
Step 4: Sending a verification email with instructions for the next steps
Overview
Once sales as officially closed a new customer they will send an email to support@milkcrate.tech with all new admins CCd as well as the basic information about the new customer. Your duty now is to set up a community within the MilkCrate platform for the customer, get all admin accounts created, set up their home screen and finally reply to the new customer with instructions.
Step 1: Setting up the community
- Login to MilkCrate’s master account ( master@milkcrate.tech pw MilkCrate4486 ) >Clients> Add a Client
- Add the basic information (anything on the main tab above general config) from Hubspot and make up a relevant short community code (no spaces). Please add a good logo.
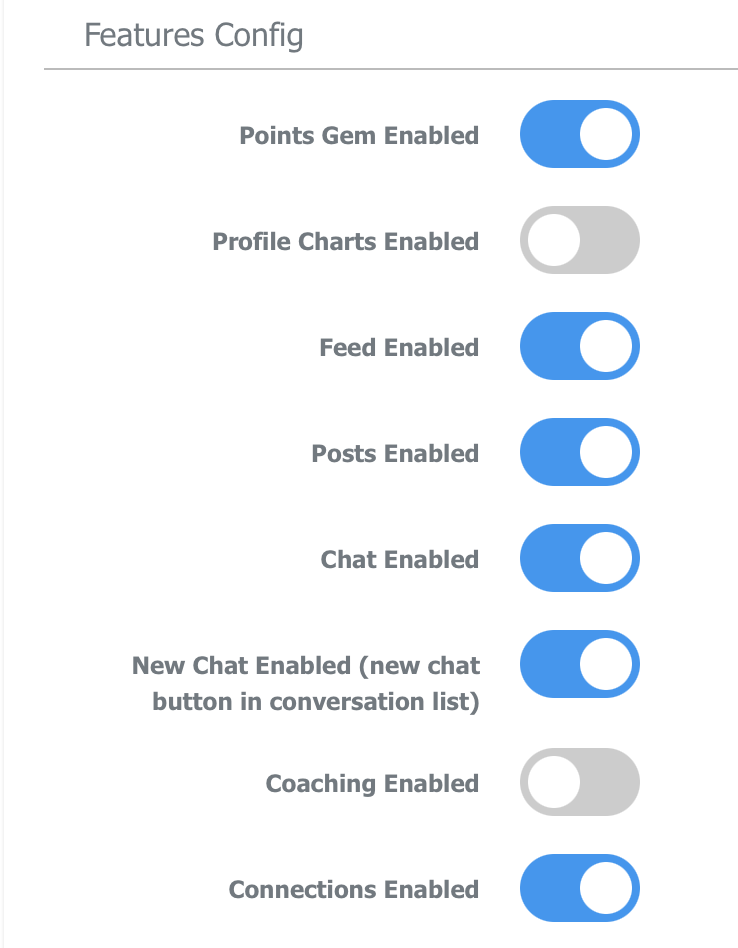
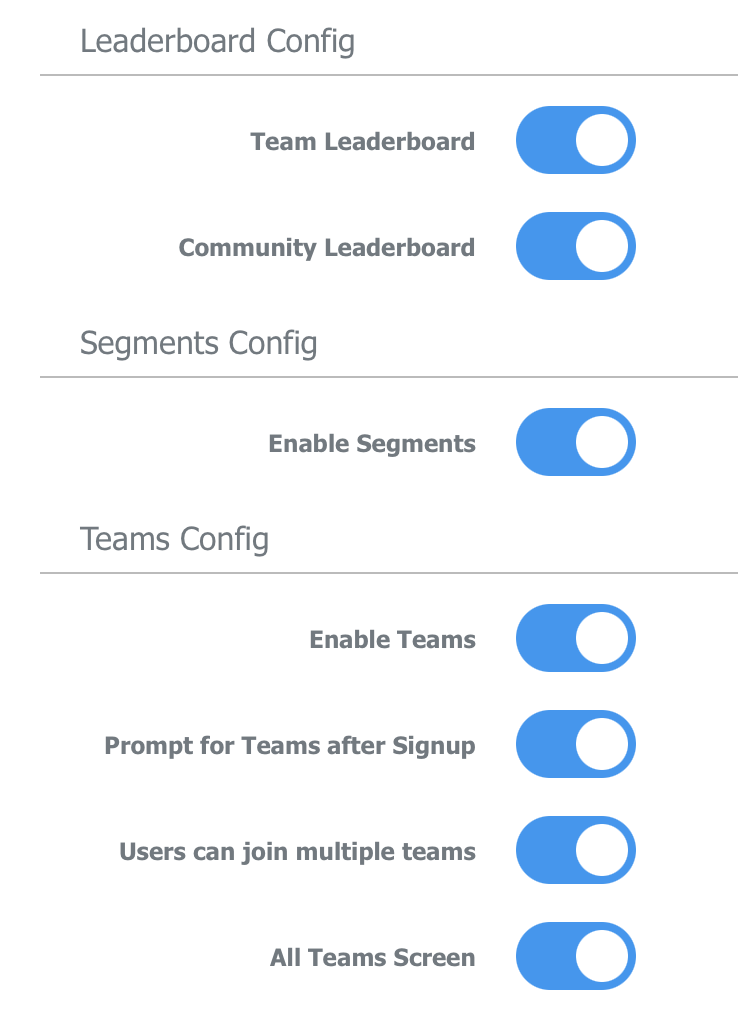
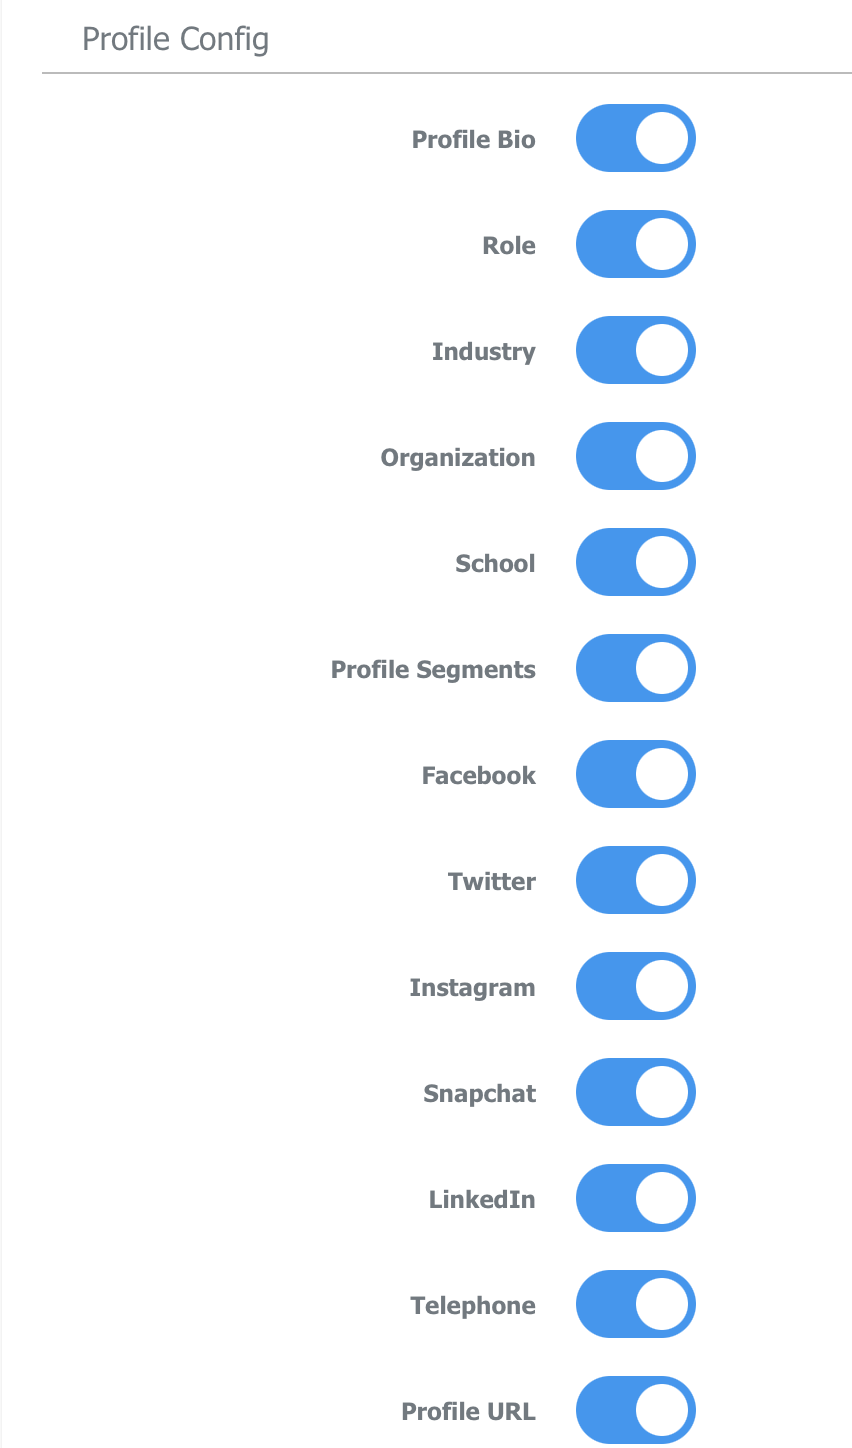
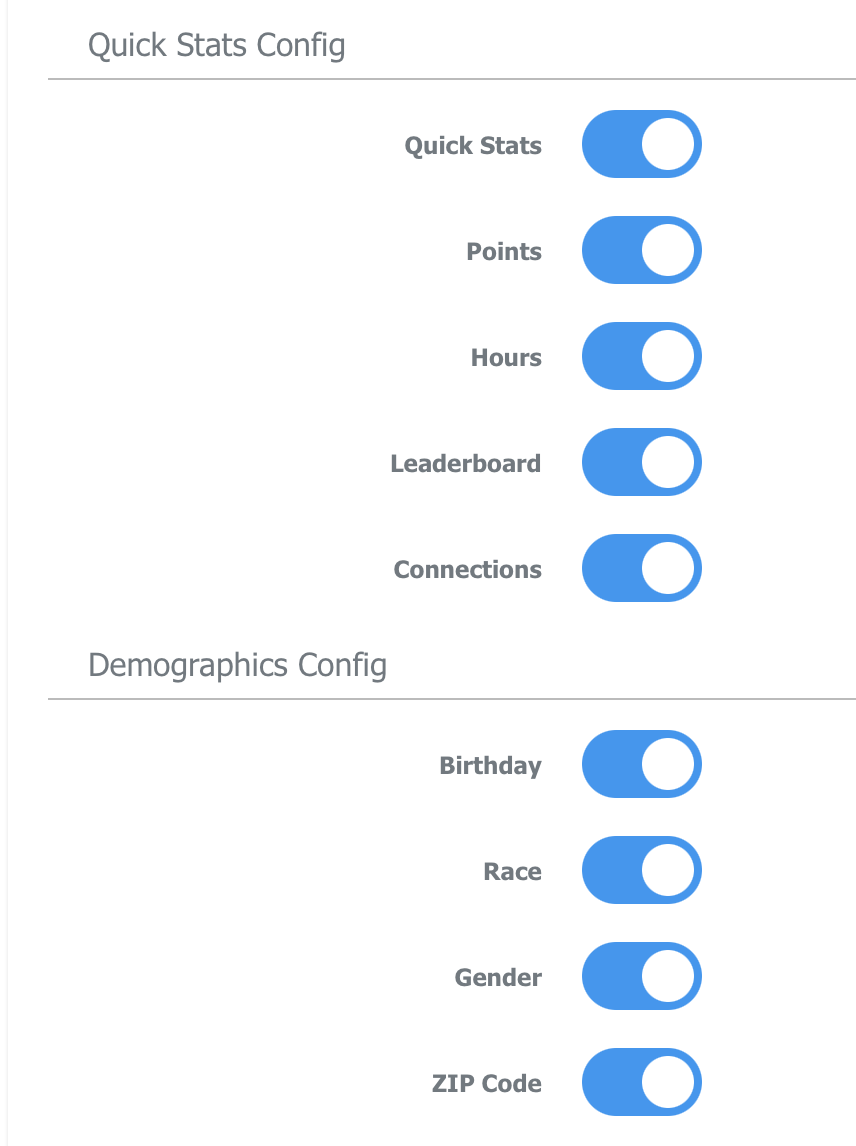
- Set up the toggles to look like this below
- Set up the Menu to look like the test community Fairmount Park Conservancy (some will not be on the default menu and you will have to add in events by hand and ignore the events in the default menu). Finally add the app name, no spaces and hit save.
- Note: DO NOT TOUCH THE AWS CONFIG. It will literally stop everything from saving and kill the screen. In case you have touched the AWS Config toggles, simply refresh the page.

Step 2: Adding Jamie Crate
- Use the MilkCrate for Communities app to create an account for Jamie Crate. You will need the community code.
- Name: Jamie Crate
- Email: clientname@milkcrate.tech
- Birthdate: 10/10/1995
- PW: MilkCrate4486
- Head back to the Master Admin, go to "Users", find the account you just created, and enable Jamie Crate as an Admin
- Post the new customer to the list
Step 3: Setting up the home screen
- Login to Bend email: team@milkcrate.tech pw: !mpactTech
- Scroll down to screens section and hit new screen so we can create the home screen
- Remove the {} and then paste the following code into the new screen
{
"cName": "CUSTOMER IDENTIFIERS",
"tiles": [
{
"items": [
{
"title_disabled": "New Customer Visual",
"backgroundImage": "https://dl.airtable.com/.attachmentThumbnails/907ea462651849a45d47eb5b3b890736/d7fa1db8",
"flex": 1
}
],
"type": "square-buttons"
},
{
"type": "about-milkcrate"
}
],
"slug": "home",
"teams": [
"All Teams"
],
"title": "APPNAME",
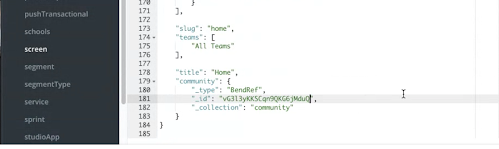
"community": {
"_type": "BendRef",
"_id": "CUSTOMERID",
"_collection": "community"
}
} - cName -- Replace the text within the quotes with the name of the organization with any other identifiers
- title -- Replace this with the name of the app
- community > _id -- replace this with the id of the community. This can be found by going into the Master Admin and clicking on the community's name and then the URL will have the ID
- Save and then login to the MilkCrate for Communities app using the new Jamie Crate email and password to double check that it looks right.
Step 4: Sending a verification email with instructions for next steps
Subject: Your app's test environment has been created!
Hi _______________,
Accessing your app's test environment
- Please Download MilkCrate for Communities in the App Store or Google Play Store.
- Create a new account and enter the following code ___________.
- Sign up for a training session to access the Admin Portal.
Attending a training session
Before we match you with one of our Onboarding Specialists and give you access to the Admin Portal at least one of your team members is required to attend a platform training session. We will review all the steps your team must take in order to successfully launch your app.
What you can do in the meantime
In order to publish your app, Apple Developer and Google Play Developer accounts are required. You can get started on creating developer accounts prior to your training session. This process could take a couple of hours or a few weeks so we highly suggest getting started now!
With care,
The MilkCrate Team
Related Articles
Home Screen Ticket (How to Complete)
Table of Contents Overview Daily Polls Block Challenges Block Goals Block Leaderboard Block Link Block Headers & Images Block Spacer Block Survey Block Categories Block Built by MilkCrate Block Sub Screens Overview Our blocks make it easy to ...Customer Meeting Recap Ticket (How to Complete)
Table of Contents Overview Step 1: Document the Meeting in Hubspot Step 2: Create Follow Up Tickets Step 3: Send a Follow-Up Email How to handle questions you don't know the answer to How to handle feature requests Overview What triggers the ticket? ...New Customer Checklist
New Customer Launch Check-List This is a step by step guide to transforming your program into an engaging app, using the MilkCrate platform. What do you need to be successful? Structure: Confirming what features you will use, how you categorize your ...New Community: Creating Users and Password
Table of Contents Overview (click here) Sending Next Steps (click here) Setting Up Users and Password (click here) Resources (click here) Overview One of the steps in creating new communities includes setting up New Users and Passwords for members of ...Product Idea Ticket (How to Complete)
Table of Contents Overview Identify if i How to handle feature requests If a customer is making wishful statements or demanding statements about how they desire the platform to function this is an EXCELLENT time to upsell or suggest a workaround. It ...