Platform Testing Procedures
Table of Contents
DURING Testing/Test Instructions
AFTER Testing/ Version Release/Bugs
Before Testing Setup/ New Testers
Testing in UAT
The main priority is to test the customer admin for issues and the app. Generally speaking, the type of phone you have does not matter as bugs that occur on IOS will often occur on Android. That being said, it is not impossible for phone model to alter testing results, so keep it in mind.
Logging into the UAT for Admin is easy, simply change the following URL (https://milkcrate-prod.web.app/#/signin) to (https://milkcrate-uat.web.app/#/signin)
Logging into the testing version of the App requires a few more steps. You will need to have your Product Manager enroll you into the testing platform, this varies from IOS to Android.
=======================
CREDENTIALS
Master Admin:
Used for making changes to other Admins
URL: https://milkcrate-uat.web.app
-
- Username: fpc@milkcrate.tech
- Password: MilkCrate4486
Customer Admin (UAT):
Used for making changes to customer Apps
URL: https://milkcrate-uat.web.app
-
- Username: fpc@milkcrate.tech
- Password: MilkCrate4486
Customer Admin (PROD):
Used for making changes to customer Apps
URL: https://milkcrate-prod.web.app/#/signin
-
- Username: fpc@milkcrate.tech
- Password: MilkCrate4486
=======================
Accessing IOS Testing Platform
-
- Contact the Customer Success Associate or Product Manager and give them your Apple ID email address.
- You will receive an email to accept from Apple, afterwards let your contact know and you will receive a second email that you will also have to accept for the Testflight program.
- Go to the app store and download the Testflight app and then the test version of MilkCrate for Communities will be available to you.
- Username: fpc@milkcrate.tech
- Password: MilkCrate4486
Accessing Android Testing Platform
-
- Contact the Customer Success Associate or Product Manager and give them your Android affiliated email address. They will send you a url to enroll in the Google Play testing environment.
- Make sure you have MilkCrate for Communities downloaded. It will take at least a couple of hours for your app to process that you are a tester.
- Username: fpc@milkcrate.tech
- Password: MilkCrate4486
Testing Instructions
UAT Testing Meeting. Meetings will occur the Monday after a sprint has been completed. Meet with Product Manager to go through the app and test new features, as well as past features.
- Confirm that the admin's UAT is up-to-date, and the Milkcrate for Communities test-flight is on the latest version.
- Create a single task, mark it as an epic, the importance as critical, and assign it to the sprint that just started.
- Review with the Product Manager all bug fixes and changes that were assigned to the version’s associated sprint.
- Next step, test all new features/bug fixes: write down any issues you come across.
- Final step, test all pre-existing features: write down any issues you come across.
When performing UAT testing you will be switching back and forth between the customer admin and the MilkCrate for Communities app (for both you will be logged into the FPC community, credentials can be found below). Whenever you save an alteration in the Admin, check to see that the same exact information is available in the app. For instance if it says an event has a survey attached, register for the event to see if the survey pops up etc. Basically just make sure that changes that you make in the Admin are reflected in the app.
New User Test
In order to simulate a new user, delete the Milkcrate for Communities app and redownload it.
- Open up the app and register a new user in FPC (do not use a real email address, make one up: exampletest@hotmail.com)
- When you are registering make sure all the onboarding screens appear as expected.
- Once registered, log into the Admin and make sure the new user appears as expected.
- When you've completed testing, delete the user on the Admin.
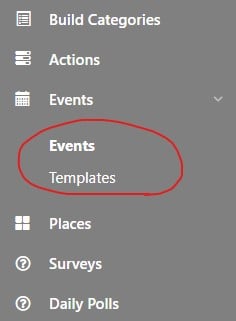
Event Template Check
- Create a new template with a cover image, volunteering enabled, and event capacity set to 10 and a physical location geo verification required, add an outside registration url.
- Use the template for an event happening soon and add a segment you are not a part of, and a survey, and three speakers.
- Remove the segment, register for the event and comment.
- Cancel your registration (check the admin) then register and check in.
- Check In as another user as well.
Testing Digital Events (Accessed Through URL & Phone Call)
- Create an event that is happening soon. Give yourself some time as once the event occurs, you will not be able to modify it in the Admin.
- Fill out the "name," "short description," "and "description" areas appropriately.
- Leave the "Recommended Event" and "All Day Event" toggles disabled for now.
- Fill out the date area. Make it soon, but give yourself time to be able to modify the event.
- Leave the "Volunteering Event" and "Recurrent Event" toggles disabled for now.
- Select a category.
- Select a survey, add a speaker, and input an image.
- Set both "Check-In Points" and "Registration Points" to 10.
- Set "Event Capacity" to 2.
- Enable both "Notify when people cancel," and "Notify" when event is full" toggles.
- Apply a segment. Make sure the account you're logging in with has this segment. Otherwise you will not be able to see the test event.
- Leave the "Website URL" and "Outside Registration URL" empty for now.
- Set the "Event Type" area to "Digital Event, Accessed Through URL."
- Add in a URL to the "Check-In URL" area. A zoom or google meeting will work.
- Save and enable the event to begin testing.
GENERAL TESTING- Make sure the event appears under the calendar in the appropriate location.
- Register and make sure you receive the appropriate amount of points.
- When registered in app, check the Admin to see if you can view participants.
- Make sure you can see the attendee list in the app, if no one is registered it should say "be the first to register".
- Check-In and make sure you receive the appropriate amount of points.
- Upon checking-in you should be redirected to the check-in URL, make sure this only occurs AFTER you check-in.
- Sign-in with another account. Make sure this account does not have the segments required to view the event. Make sure you can't see the event.
FURTHER TESTING
-
- In the Admin, enable "Recommended Events" and check the app to ensure that the event now appears under recommended events.
- In the Admin, enable "All Day Event" and check the app to see if the time has been changed appropriately. IMPORTANT: if your event is occurring on the same day as your testing, enabling this toggle will qualify the event as already having occurred. You will not be able to make any further changes so maybe save this for last.
- In the Admin, enable the "Volunteering Event" toggle. Just make sure nothing breaks.
- In the Admin, enable the "Recurrent Event" toggle. Look below for further instructions.
- In the app register for an upcoming occurrence (just one) and check to see if you can only see your registration on the one occurrence.
- In the app cancel your registration & check the admin.
- In the app register again only for all occurrences & check the Admin.
- In the app cancel for just 2 occurrences from now and check that the Admin reflects this.
- In the Admin, switch the "Event Type" section to "Digital Event, Accessed Through Phone Call." The easiest platform to test this with would be zoom
- Input the zoom meeting phone number and save the event.
- In the app, register and check-in. As before make sure you receive the appropriate points for both.
- Once you check-in you should be redirected via phone call. Make sure this occurs as expected.
Testing In-Person Events
- Create an event that is happening soon. Give yourself some time as once the event occurs, you will not be able to modify it in the Admin.
- Fill out the "name," "short description," "and "description" areas appropriately.
- Leave the "Recommended Event" and "All Day Event" toggles disabled for now.
- Fill out the date area. Make it soon, but give yourself time to be able to modify the event.
- Leave the "Volunteering Event" and "Recurrent Event" toggles disabled for now.
- Select a category.
- Select a survey, add a speaker, and input an image.
- Set both "Check-In Points" and "Registration Points" to 10.
- Set "Event Capacity" to 2.
- Enable both "Notify when people cancel," and "Notify" when event is full" toggles.
- Apply a segment. Make sure the account you're logging in with has this segment. Otherwise you will not be able to see the test event.
- Leave the "Website URL" and "Outside Registration URL" empty.
- Save and enable the event to begin testing.
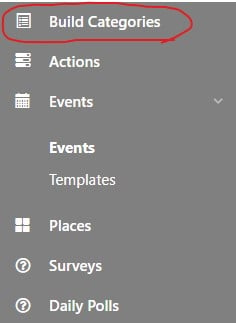
Testing Categories
- When creating New Categories, click "Build Category"
- Create name
- Input Slug
- Enable toggle works
- Select category group (if available)
- Input images and save
- Add an action to the category and review in-app that the two are linked as expected.
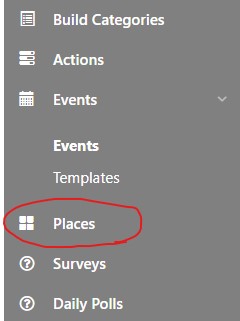
Testing Places
- In Admin, go to Places. Add a Place, Input the Name and Enable the toggle
- Added Description, cover image, location, save
- Open app and find newly added place
- Cover image, location, and description appear correct
- Check In to place successfully after going back to admin and removing the check in radius
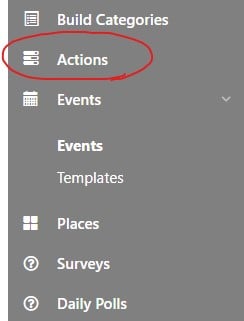
Testing Actions
- In the Admin, create a new action and add the following video URL http://commondatastorage.googleapis.com/gtv-videos-bucket/sample/ForBiggerJoyrides.mp4 save the action and check the app and ensure the category cover image displays
- In the admin, add a cover image and then check if the cover image displays in the app
- In the Admin remove the video URL and add https://www.soundhelix.com/examples/mp3/SoundHelix-Song-1.mp3 check the app to ensure it looks right and you will receive points for finishing the audio, go back to the Admin and make sure it says 1 user has completed.
- PROCESS
- add new action
- add categories to the action
- enable and name the action, add cover image, points, video url and check on the app.
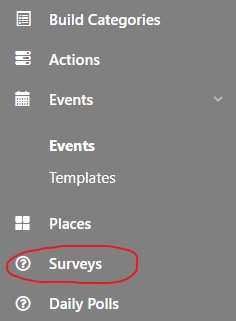
Testing Surveys
- On the Admin, under "Create Activities," click on the "Survey" tab.
- At the top right corner of the page hit the blue "Add a Survey" button.
- Enable the survey (toggle switch)
- Enter name, date, points, and select a category
- Click the blue "Add Question" button located near the bottom left corner off the form.
- Using the "Question Type" dropdown menu, select and add one of each type of survey.
- When you are creating the surveys, there is a toggle switch labeled "Required." Toggle this off for one survey of your choosing. When you test this in app, try to continue past the non-required survey and make sure that it allows you to continue without answering the question. For all other surveys, leave it toggled ON.
- Once you've gone through and answered the survey, you will need to check for completion. The Admin shows users that have completed the survey. Log into the Admin and check to see if the survey responses have been recorded.
-
- Single Select (in depth)
- In "Question Text," input your question.
- In "Details" input question details.
- Click the blue "New" button to add a new question. Input a title for your answer and hit the blue "Save Answer" button. REPEAT once more so you have a total of two answers to select from.
- Hit the blue "Save Question" button.
- TESTING: When answering this in the app, select one of the answers
- Multiple Select (in depth)
- In "Question Text," input your question.
- In "Details" input question details.
- Click the blue "New" button to add a new question. Input a title for your answer and hit the blue "Save Answer" button. REPEAT twice so you have a total of three answers to select from.
- Hit the blue "Save Question" button.
- Single Select (in depth)
-
-
- TESTING: When answering this in the app, select two of the answers
-
-
- Single Line Text Input (in depth)
- In "Question Text," input your question.
- In "Details" input question details.
- Hit the blue "Save Question" button.
- Single Line Text Input (in depth)
-
-
- TESTING: When answering this in the app, type a brief sentence.
-
-
- Multi-Line Text Input (in depth)
- In "Question Text," input your question.
- In "Details" input question details.
- Hit the blue "Save Question" button.
- TESTING: When answering this in the app, type a longer sentence.
- Picture Input (in depth)
- In "Question Text," input your question.
- In "Details" input question details.
- Hit the blue "Save Question" button.
- TESTING: When answering this in the app, input a picture. (Make sure it loads in before continuing on to the next question)
- Multi-Line Text Input (in depth)
-
- Slider (in depth)
- In "Question Text," input your question.
- In "Details" input question details.
- Input a Min. Value of 0 and a Max. Value of 10
- Using the "Label" section, give each value a title.
- Hit the blue "Save Question" button.
- TESTING: When answering this in the app, use the slider and select a value.
- Slider (in depth)
-
- Date (in depth)
- In "Question Text," input your question.
- In "Details" input question details.
- Hit the blue "Save Question" button.
- TESTING: When answering this in the app, input a date.
- Date (in depth)
-
-
- Number Input
- In "Question Text," input your question.
- In "Details" input question details.
- Hit the blue "Save Question" button.
- TESTING: When answering this in the app, input a number.
-

Testing Push Notifications
- Create new push notification
- Fill in title, and message.
- Segments:
- Users:
- Attempt without specified users. See if push defaults to segments.
- Attempt with specified users. See if appropriate users receive the push.
- Send Later:
- Attempt with "Send Later" enabled. See if push works as expected.
- Attempt with "Send Later" enabled. See if push sends at specified time.
- Create a new user, using that new account--make a post in the activity section. Have another tester post a comment under your new post and see if you receive a push notification notifying you about new comments under your post.
- Create an action, event, and place. Have one user comment under each, use a separate user (Jamie Crate) and post a second comment under each activity. The first user should receive a notification for each of Jamie's comments.
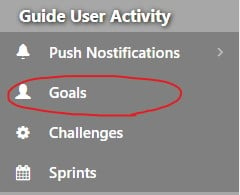
Testing Goals
- Create new goal.
- Fill in name, description, and add an image.
- Fill in Start and End dates.
- Fill in number of points required by user and select a category
- Test with/without the "Never ends" toggle enabled
- Test with/without the "Visible to all users" toggle enabled
- Test with/without a Group Selection
- Test with/without a Team Selection
- Test with/without a Segment Selection
AFTER Testing/ Version Release and Reporting Issues
Problems?
- Keep track of any bugs or problems that you encounter during your testing.
- Gather information about any bugs (ie. when does it occur? does it occur for all users? Etc.).
- Review any issues brought up with the product manager, ensuring that the stories and bugs are small, clear, numbered, and a screenshot has been attached.
- Check Airtable to see if it is a known bug, if not, then create a new task and include all the information you have gathered regarding the bug.
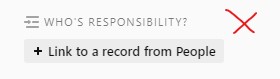
- When creating a task, in the comment area always @Sebastian Fratini and @Miranda Essig. DO NOT use the "Who's Responsibility" section. Don't do it.
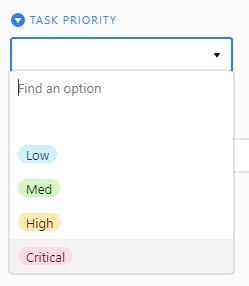
- If the task is "Critical" then set "Sprint" section to next upcoming sprint (In Progress). If it is anything other than "Critical" set it to the sprint after the upcoming sprint (Planning).
- Example: When a bug is found in sprint 10, if the bug is critical then it should be placed in the upcoming sprint (Sprint 11). If the bug is not critical, then it would be placed in the next sprint (Sprint 12).
- When creating a task, in the comment area always @Sebastian Fratini and @Miranda Essig. DO NOT use the "Who's Responsibility" section. Don't do it.
Version Update
Take a look at the sprint that just finished and review all the changes made. Each change must be tested but we also need to make sure the customer is aware of any changes or major bug fixes. This means writing a platform update article (to summarize all feature improvements and bug fixes) and making updates or new articles for any other feature improvements. Include in the help article:
-
- A catchy title and the number of the version.
- All the improvements and major changes.
- Any new features.
If there is a feature improvement it must be added into pre-existing help articles in some way shape or form. Bugs are not relevant to help articles but please go back and check that someone didn’t write in that the bug exists into the help articles.

Related Articles
Platform Environments
Each one of our GUIs has three environments, one for developers (QA), one for product testing (UAT), and the last for customers and their end users (PROD). Every time we have a new version of the platform it flows through each environment. When a new ...Platform Bugs & Features
Overview Check Feature Documentation (here) What are Bugs? Why do they happen? (here) How do we Prioritize Bugs? (here) Submit a bug here (here) Check the Feature’s Documentation See if it performs that way on purpose Clear Cache & Refresh If this is ...Platform Updates Calendar
Please note: Apple requires us to delete updates that have not been released to your audience in order to submit a new update. If you do not update your app within 6 weeks you are required to wait until the next release goes through review and ...Platform Enhancement
A requested new specific feature will be charged at a discounted rate if we see that it will serve the good of the whole customer base: billed at $100 an hour.Key Terms
Platform Environment/Software Environment: A computer system in which a computer program is deployed and executed. Simple software may only have one environment, which means any changes made to the software are seen immediately by users. There are ...